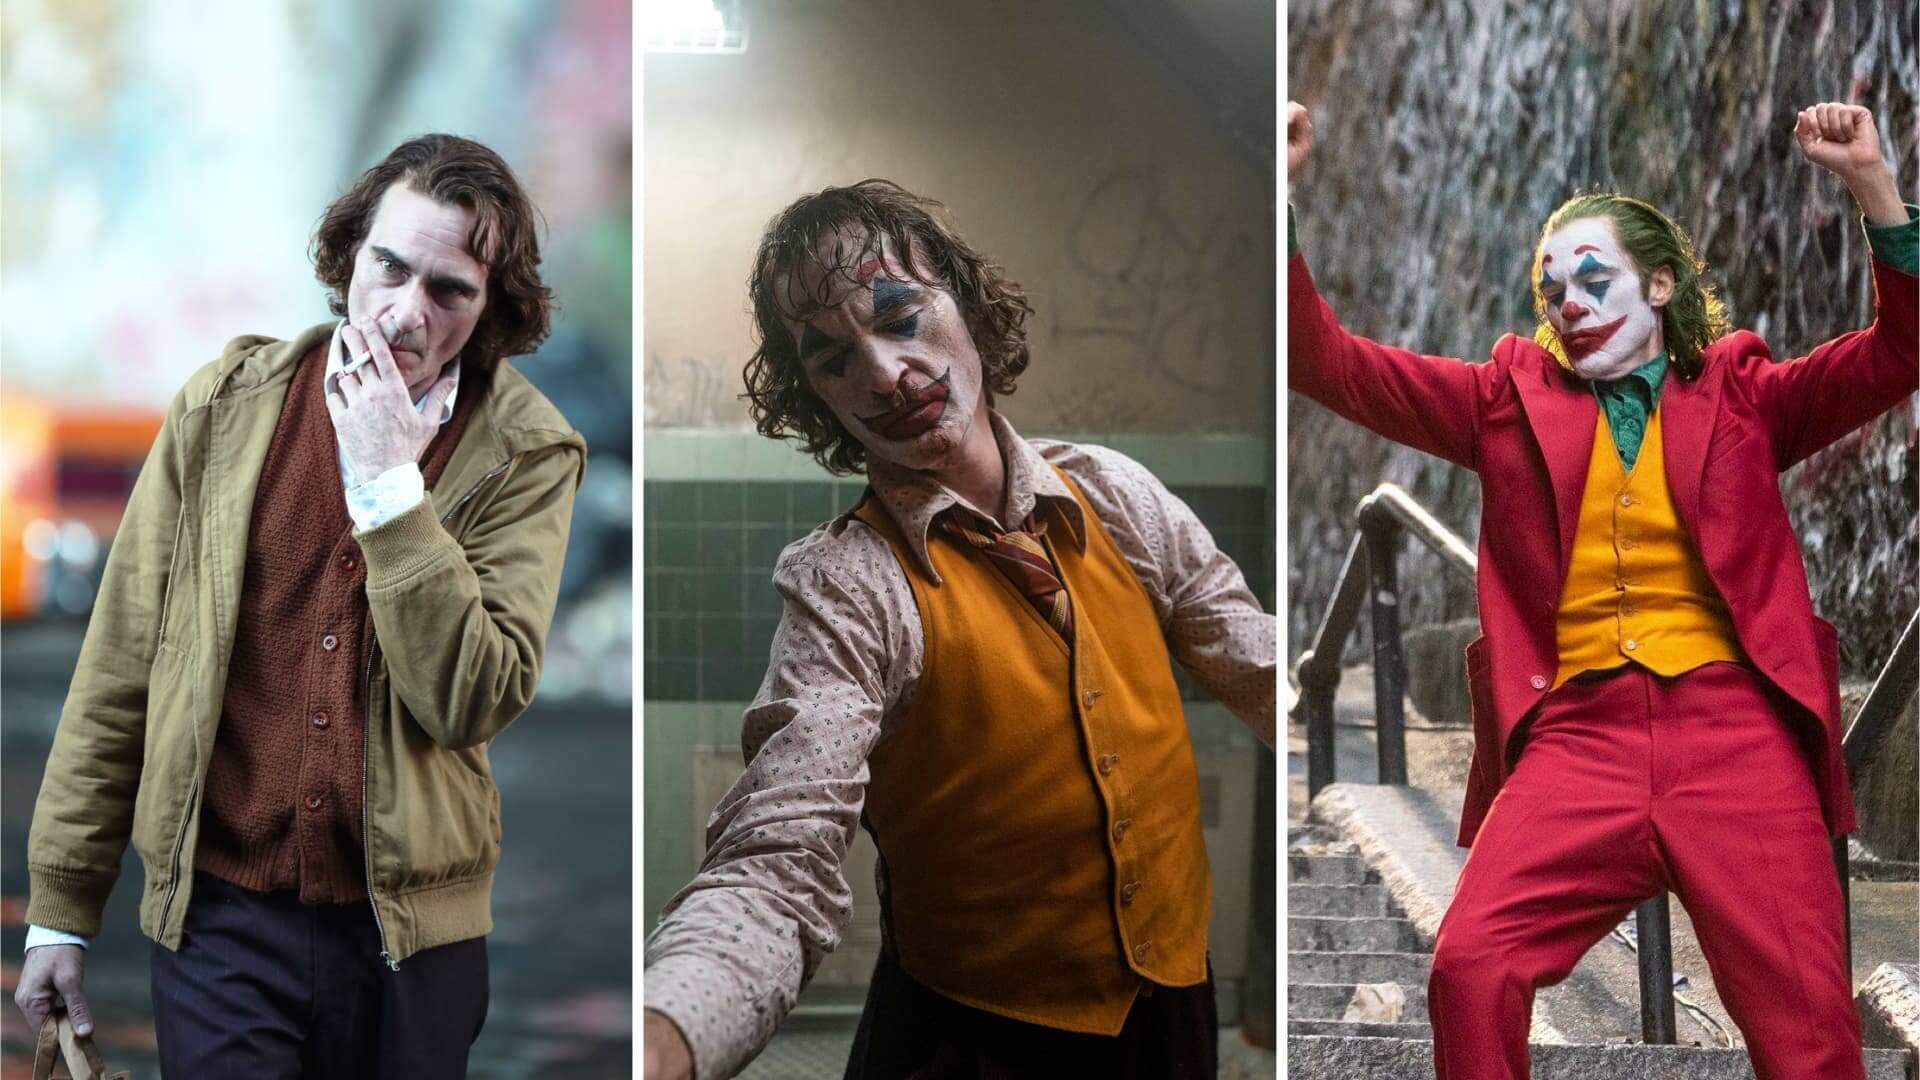
In filmmaking, we’re often told that the screenplay is the blueprint, but hand-in-hand with that is the script breakdown. Every show, no matter how big or small, starts with the script breakdown.
Not only does the breakdown give us the first sense of what the world of the story will look like, it also informs each department of what they’ll need to build, source, or purchase in order to bring the story and the characters to life.
In this post we’re going to think about those things, with special focus on the costumes. We’ll use Joker as an example because this film offers many valuable lessons on how much goes into costuming decisions.
Character Analysis
Step 1: Consider the character
Obviously, before you can begin designing a character's costume, you need to know who they are. The more you know about the character, the more accurate your wardrobe choices will be.
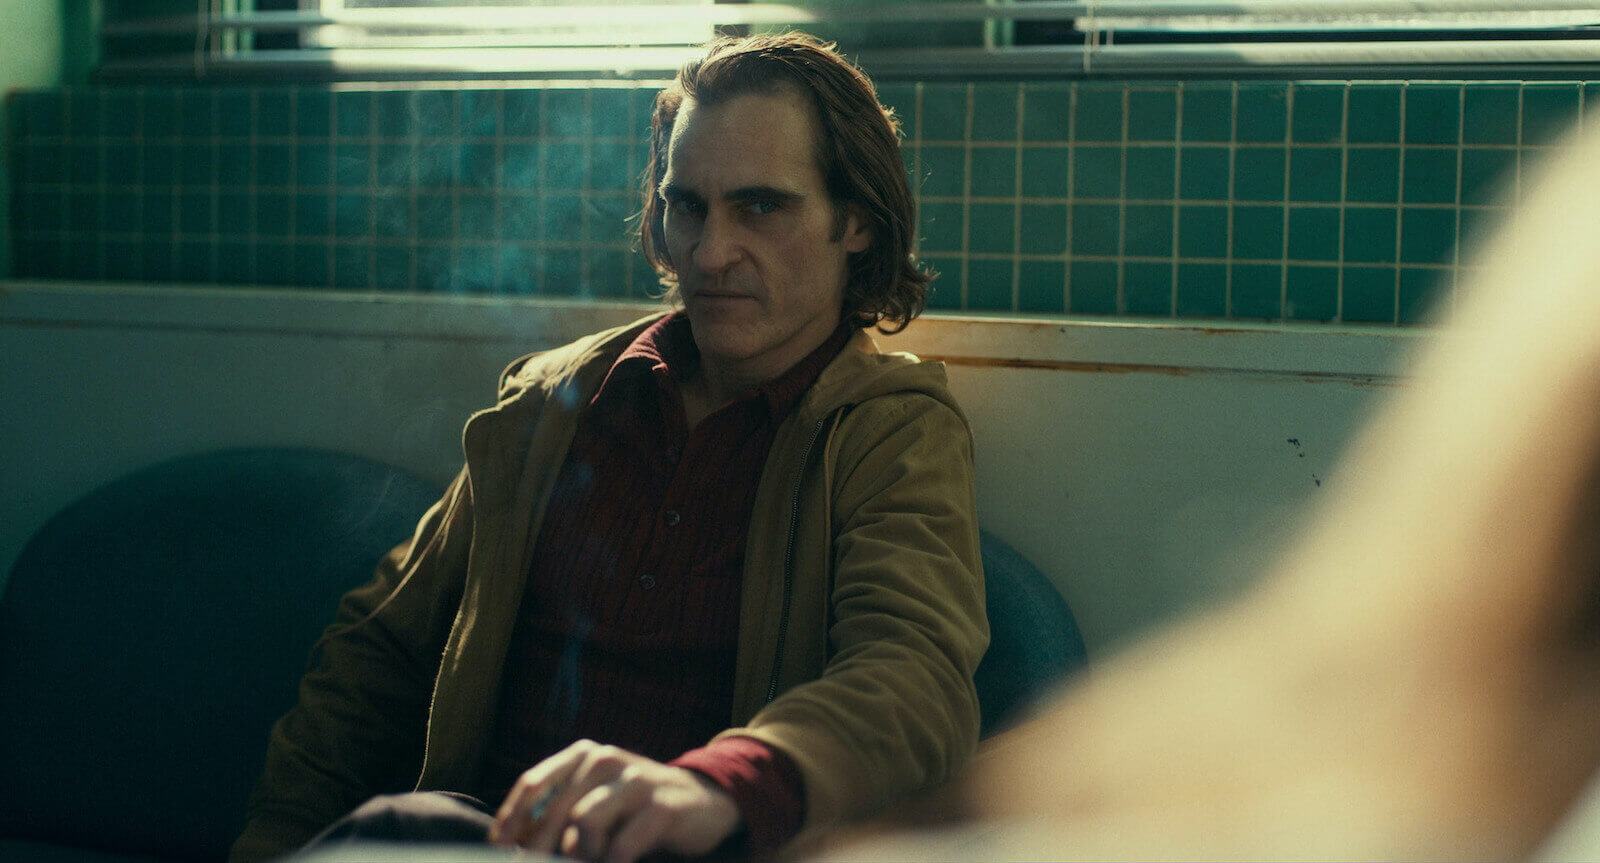
Before we get started, let’s remind ourselves of who Arthur Fleck is. Here's an early scene from Joker where we learn a ton about Arthur and his current situation. Watch the scene and then we’ll talk about how to think about this character in terms of costume.
Therapy Scene • Joker
There’s a lot to consider when making decisions about a character’s wardrobe. But it starts with the basic question “Who is this guy?”
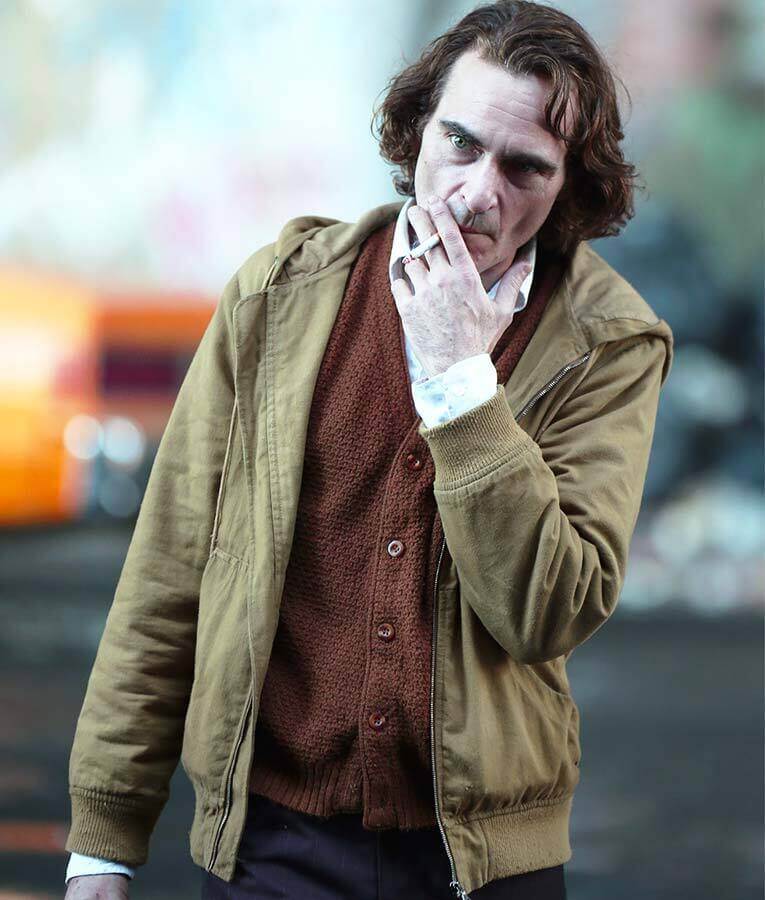
Arthur’s basic look
Mark Bridges, Joker’s Costume Designer, offers really good insight on how to think about the answer to that question. Basically, we start sussing out who our character is by using the information about Arthur that we can take directly from what’s in the script.
Here’s Bridges' general impression of Arthur's character: “He works at a crummy job, he lives with his mother, he doesn’t have a lot of money.”
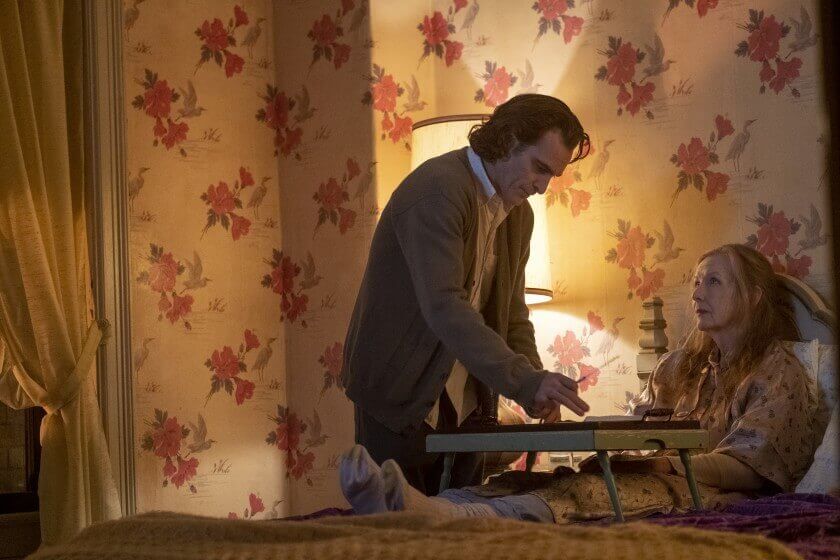
Arthur at home
With this basic information in mind, we can then go a little deeper into the story behind the character’s wardrobe. Ask yourself questions like Mark Bridges did about Arthur: “How old are his clothes? How badly kept are they?”
Finally, based on what we see him doing in the script, we can start to draw some conclusions about Arthur’s off-camera life. Again, here’s Bridges’s take: “When he does his laundry, he probably puts all his mom’s clothes with his, all in one load. Everything that he’s had since practically high school, he still owns, and it’s sort of in a pile in the corner, in the living room of that apartment.”
Arthur visits the hospital
Once we’ve created a clear picture of the character himself and the way he lives, we can think about executing the actual design of Arthur’s wardrobe. Choices on fabrics, color palette, styles, and patterns are all aspects of a character’s wardrobe where decisions have to be made.
And these choices have to complement the overall production design of the film. Mark Bridges explains how he chose to execute the costumes for Joker based on how he understood the character from the text:
“Every piece of clothing we used for Arthur was aged, overdyed and distressed. We wanted the feeling of his clothing to feel like his apartment. What we tried to do was have things go a little darker as his mind gets darker. As the world continues to abuse him, he goes darker in his colors."
This is a subtle but important choice because it makes a huge impact by the time Arthur transforms himself into the Joker.
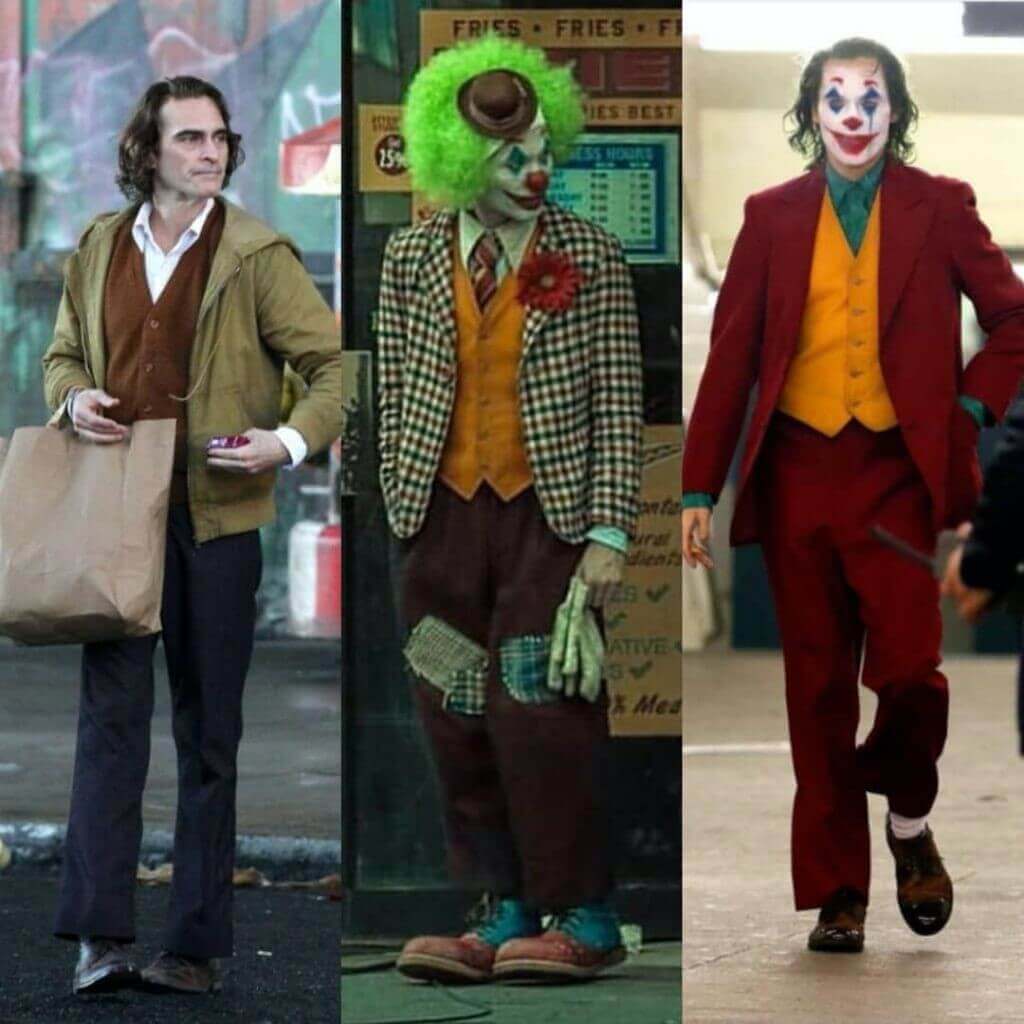
Arthur transforms
But costume decisions aren’t just about fabric and color palette. There are practical considerations as well. Let’s talk about them now.
Character Action
Step 2: How will the costume be used?
One of the main things that have to be considered in the costumes department is what the character will be doing in each scene. In a movie like Joker, Arthur Fleck does a lot of running, getting hit by cars, and taking a punch.
That means all of his costumes have to allow for these various kinds of movements, though many of them will likely be done by a stunt performer. A character’s actions in a scene will influence the choice of fabrics and other decisions.

Arthur, now Joker, runs from the cops
For Joker, Mark Bridges describes how Arthur’s garments had to be specially made but look like they’d been sourced from thrift stores:
“We couldn’t just find this golden piece in a thrift store and hope that it would work, because two or three guys needed to wear the same costume. So, that’s why everything had to be manufactured, and then aged to look like it was from a thrift store.”
Of course, other movie genres don’t have as much stunt work; but you’ll still need to consider the action taking place in each scene. Even with a simple action like the character spilling something on her top, as the Costume Designer, you’ll have to consider certain things.
For example, “How absorbent is the fabric?” (i.e. how will it look on camera) and “How many set-ups are on the shot list?” Because you’ll need to have multiples of that top.
So remember these two things when making costuming decisions: think about who the character is, and think about what we’re going to see them doing.
Script Breakdown
Step 3: Import your script
Now that we have a better idea of our character, we need to get started breaking down the script for the Costumes department. The first step of the breakdown process is importing your script into StudioBinder.

Alternate way to import scripts
Go to the StudioBinder project, and import your script. StudioBinder can work with just about any file format, including PDF, FDX, and Fountain.
It will take a few moments for StudioBinder to process the file. And voilá! Your script is imported and ready to break down.
Tag Elements
Step 4: Tag costume elements
The AD or the Producer will do a breakdown of the entire script, but good department heads also do one for their specific department. For our purposes, we'll be tagging elements related to costume.
Once our script is imported, we need to tag all our scene elements. From the project overview, click on breakdowns to get started.

Click here to get tagging
Here's a quick tutorial on how to tag scene elements in StudioBinder.
How to Tag Scene Elements • Subscribe on YouTube
Department heads do their own breakdowns to ensure that none of their particular elements gets missed, and to get a sense of the kind of budget they’ll need to fulfill their department obligations to the story.
Now, most of the time, writers don’t call out costume elements in the script unless there’s something special we need to know, or unless it’s an important part of a character’s story arc. For example, in a wedding scene the writer might draw special attention to the BRIDE’S DRESS.
Alternatively, the writer might provide detailed descriptions of particular costumes elements, as Joker screenwriters Todd Phillips and Scott Silver did for the scene above. Here’s how it appears in the script:
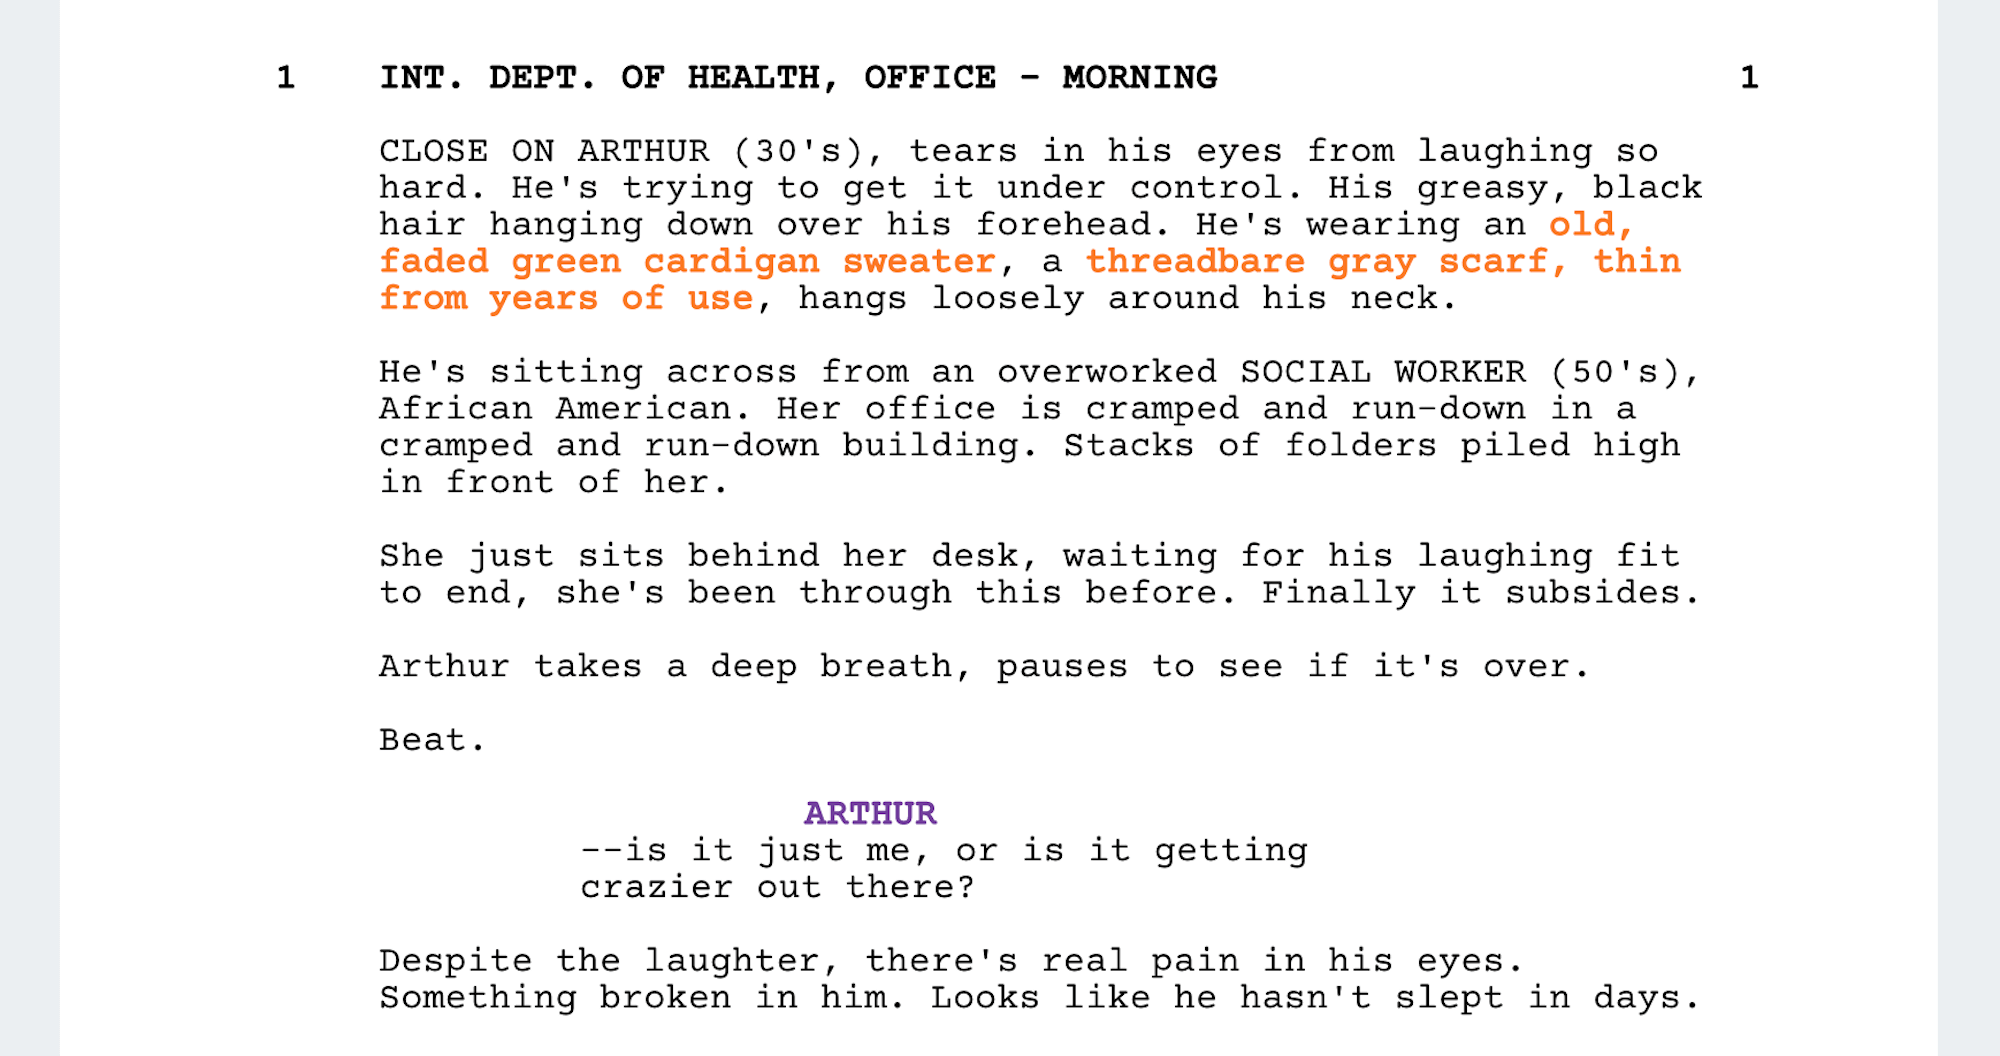
Look for details about costumes in the action
To tag an element in StudioBinder, simply highlight it — or the description of it — with your cursor. The element menu will automatically appear.
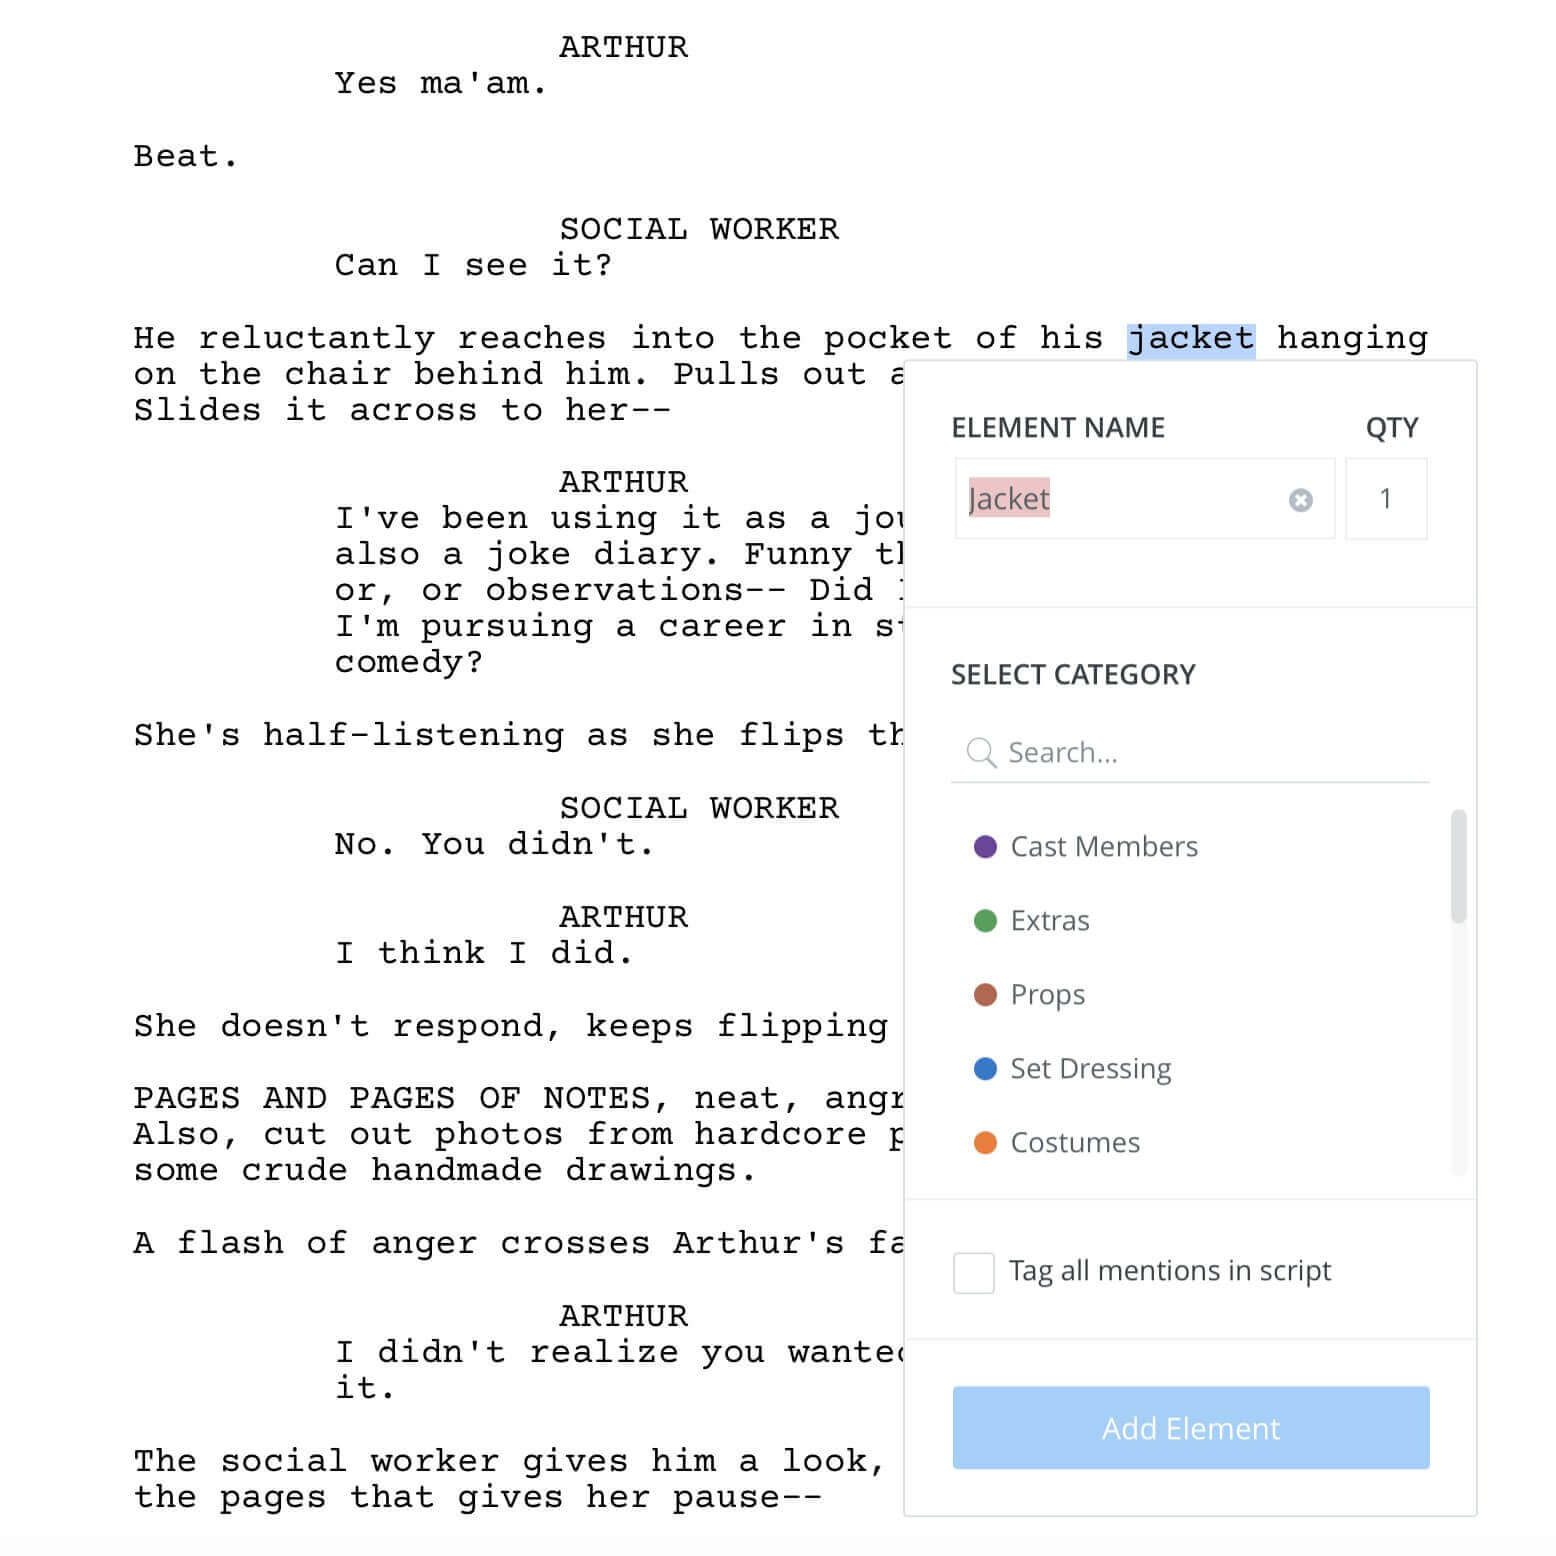
Highlight the scene element
A couple of other little tricks are super helpful in the overall script breakdown. The first is to click the box for “tag all mentions in script.”
Doing this keeps you from having to tag the same Costumes element (like “faded green cardigan”) over and over. This is especially helpful in a script like Joker, where the character’s wardrobe is limited and he’s basically wearing the same clothes all the time.
With this limited wardrobe in mind, the second trick is to manually label the Costumes elements that are associated with a specific character. For example, we’ll label "Arthur’s Jacket." Don’t forget to “tag all mentions.”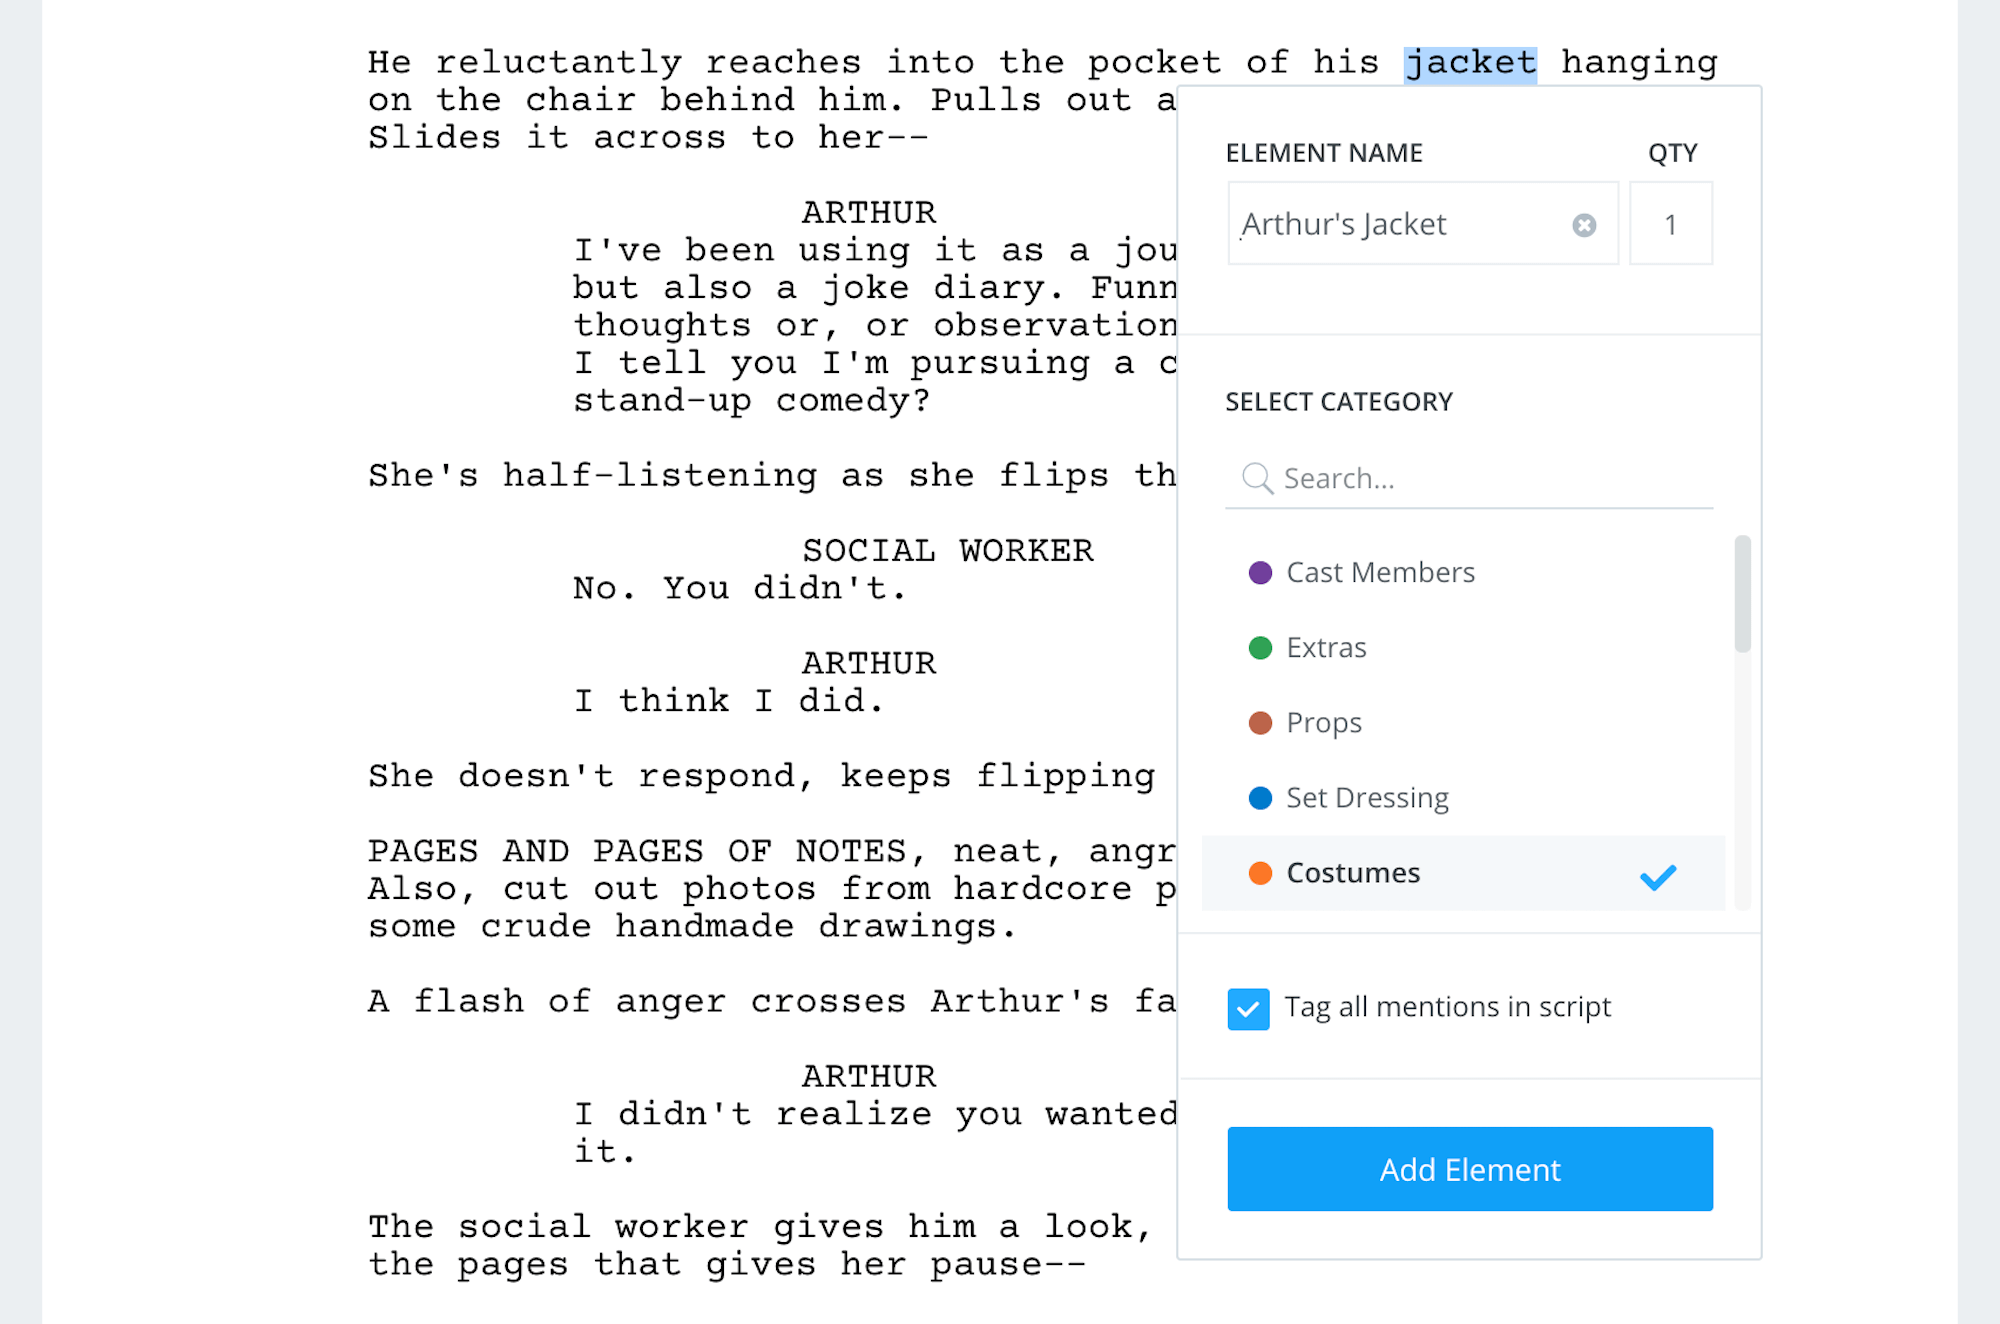
You can manually label elements
Once you've gone through the entire script and tagged all the necessary elements, the next step is where creativity and inspiration kick in. In the next section, we'll talk about the tools you can use to start actually conceiving and designing the character's costume.
Joker Breakdown
Step 5: Add scene notes
There’s another part of the breakdown process that’s very useful and that’s Scene Notes. This short video will give you the gist:
How to Use Scene Notes • Subscribe on YouTube
The best thing about Scene Notes is that we can use it to show examples of what we might be thinking for certain costumes items. For example, let’s think about Arthur’s “faded green cardigan.” We can use Scene Notes to attach images of cardigans we think might fit the bill.
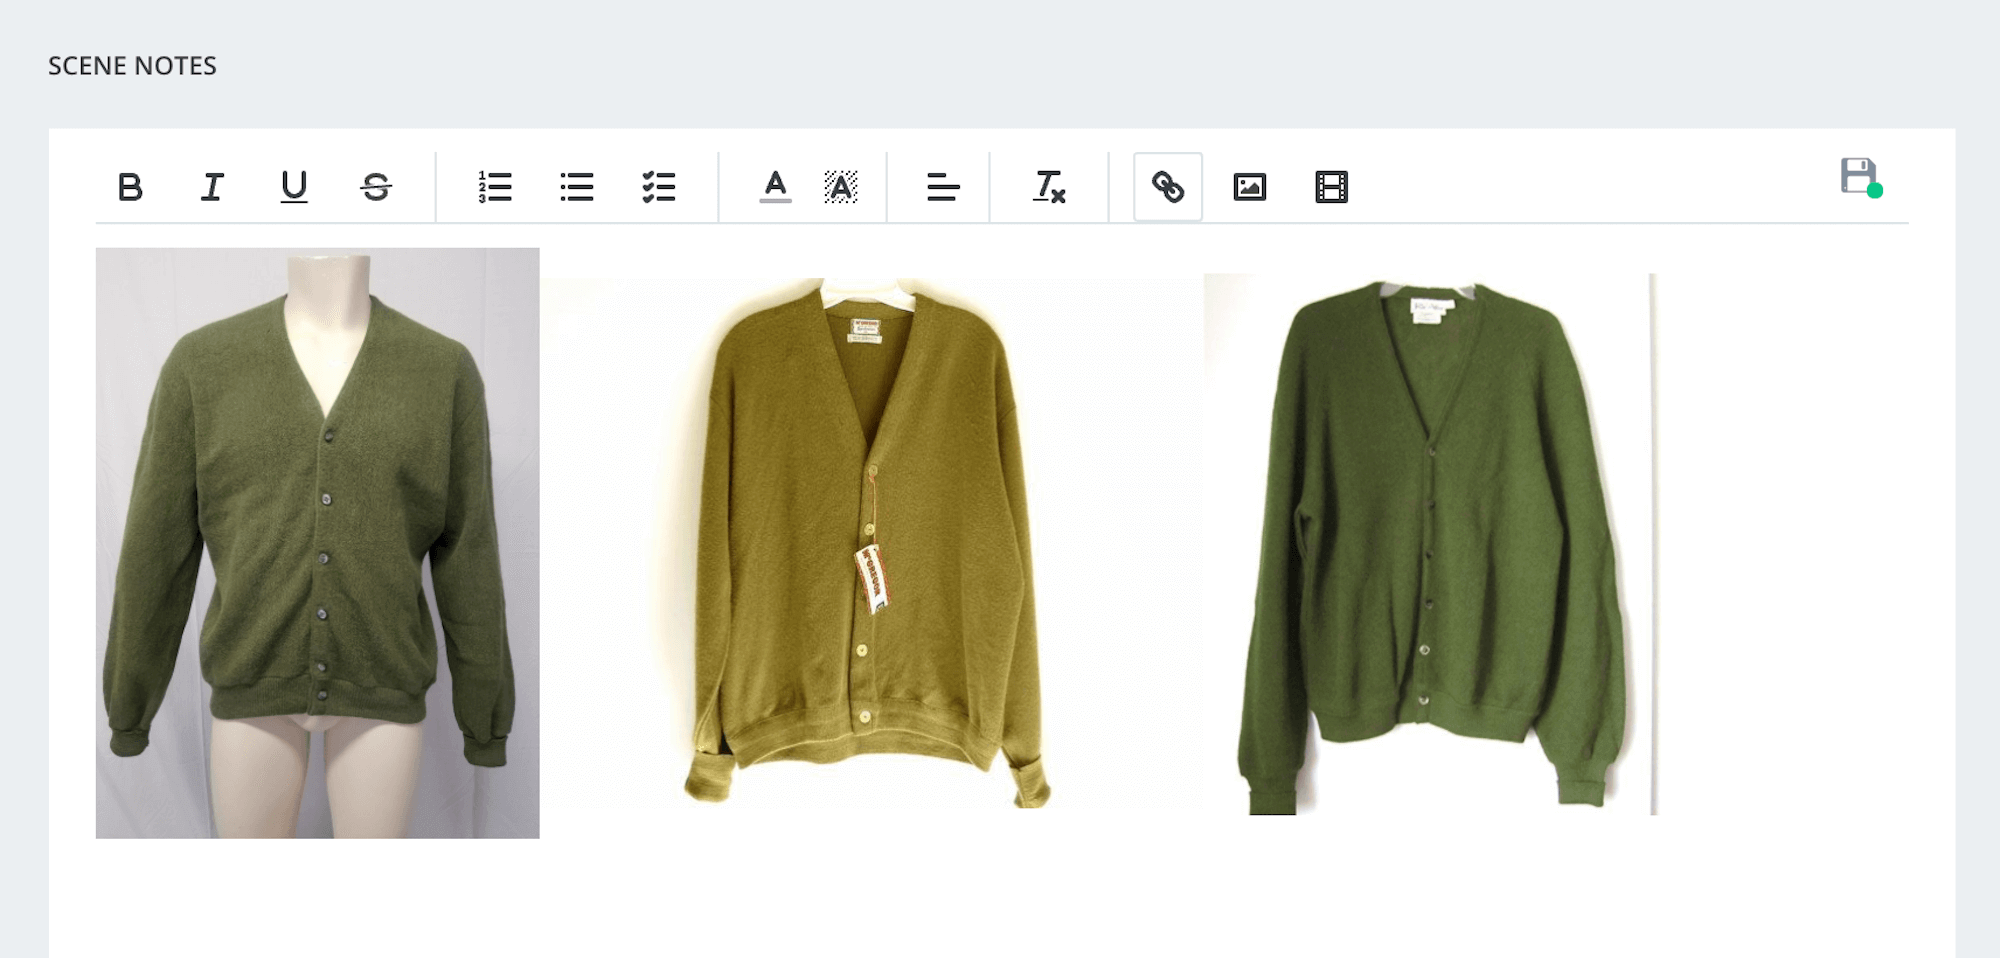
Use scene notes to show ideas
As mentioned in the tutorial above, you can also use scene notes to include links to pertinent information or design ideas. You can even include video clips that might help explain what you’re thinking.
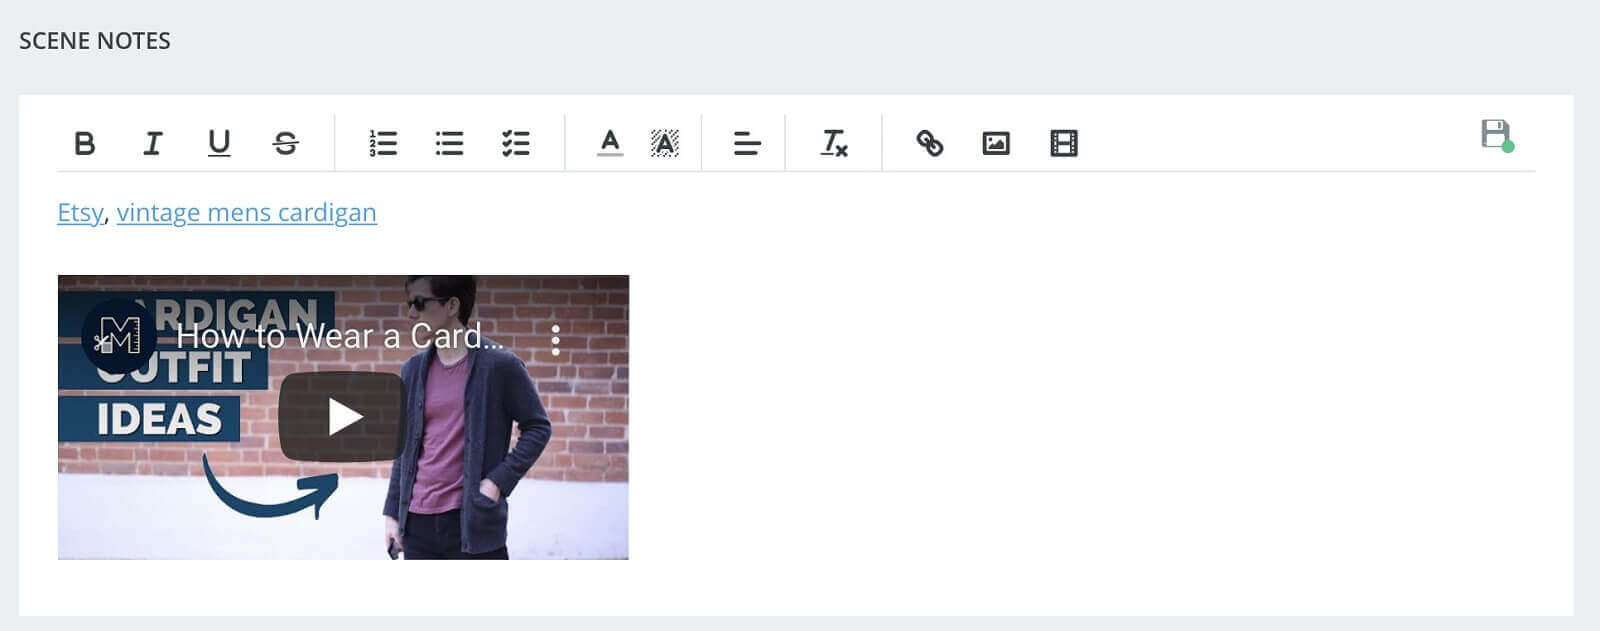
You can embed videos into Scene Notes
With your elements tagged, and inspirations added to your Scene Notes, the final step is to run a breakdown summary report. In the next section, we'll review how this is done and why these reports are so valuable.
Breakdown Summary
Step 6: Run a breakdown report
When you’re done tagging all the costume elements, you’ll have a neat and tidy Breakdown Summary. This report takes all the elements we tagged and lists them under each scene that needs them.
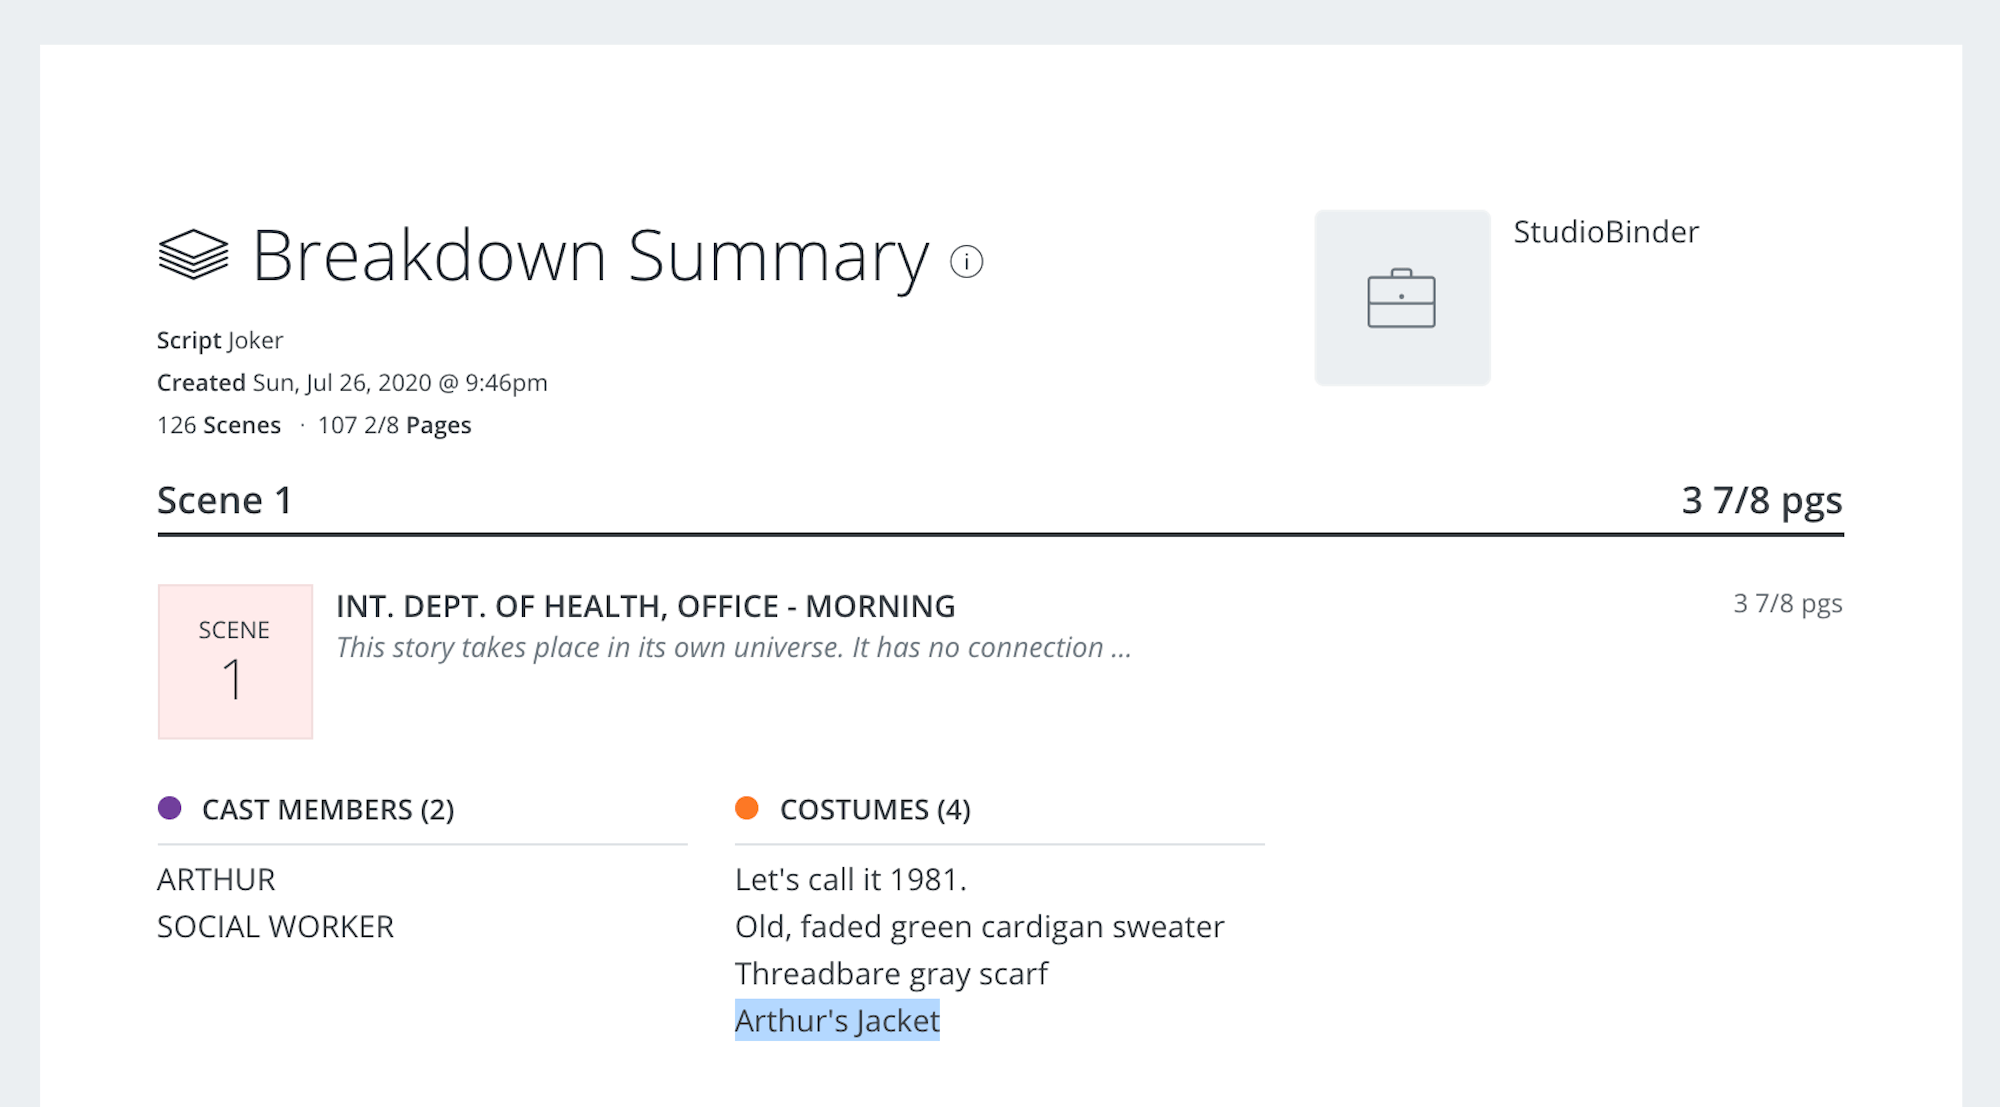
Breakdown summary sheet
We can also have StudioBinder show the report the other way, that is, we can show each costume element followed by which scenes we need it for. We do this by selecting Costumes from the Elements List.
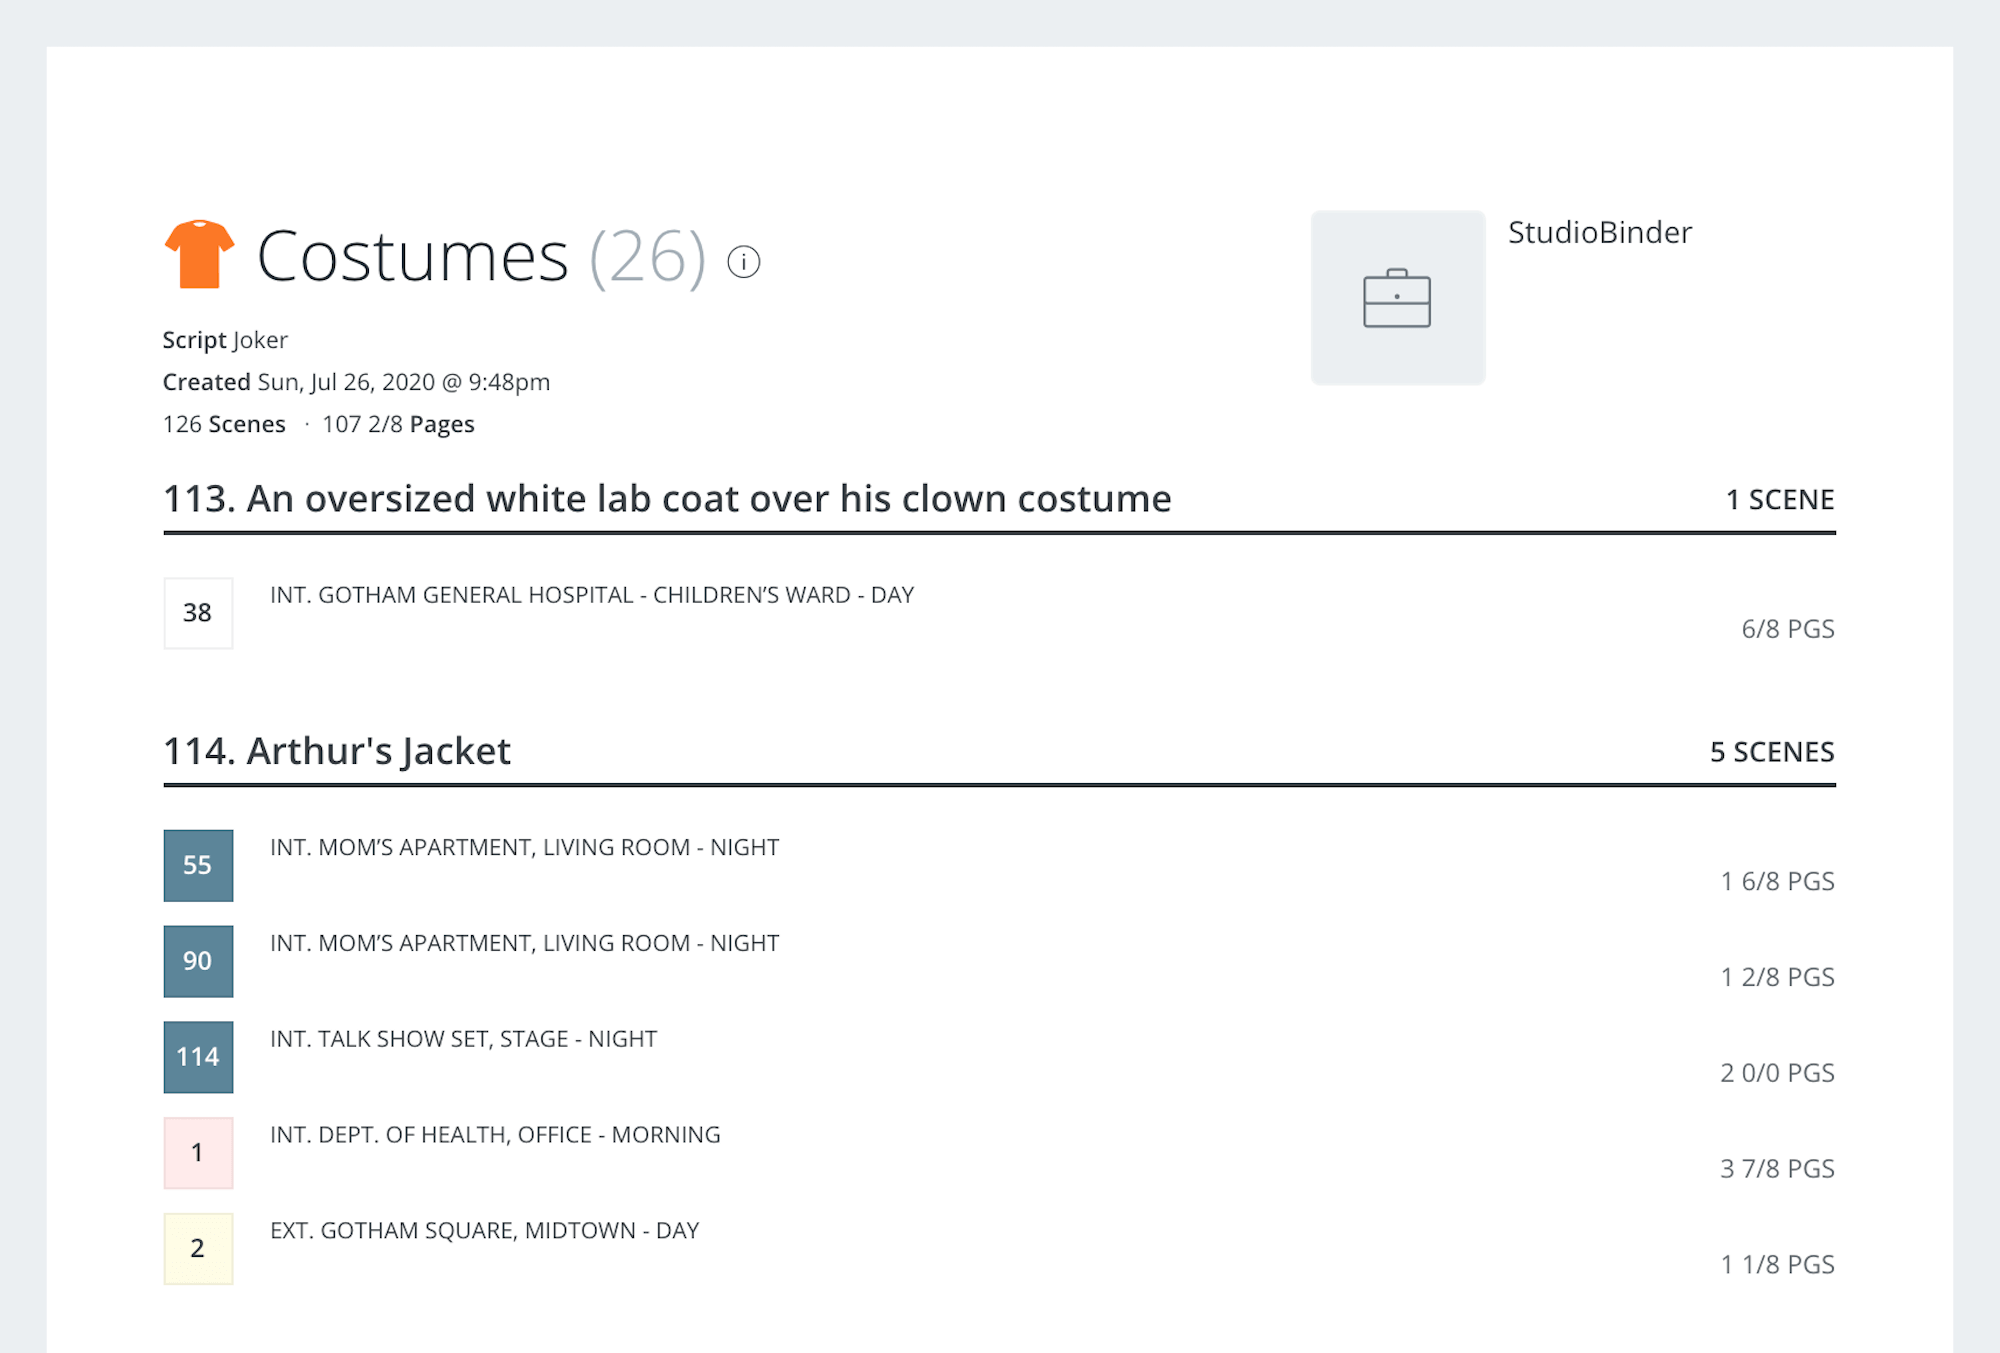
Costumes elements list
This report is an excellent way to cross-reference that we’ve tagged all the needed elements for the Costumes department.
Now that you’re familiar with how to use StudioBinder to tag elements, and you have a starting point to start thinking creatively, you’re ready to break down your script for Costumes.
UP NEXT
How the Parasite set creates meaning
Now, we’re going to take a look at Bong Joon-ho’s script for Parasite and do a deep dive into how you would tag its characteristic set dressing in a real-world production scenario.
Up Next: Parasite's Set Design →
Easily create script breakdown sheets online.
Import scripts. Tag elements like props, wardrobe, and cast. Create breakdown summaries and DOOD reports in a snap.
