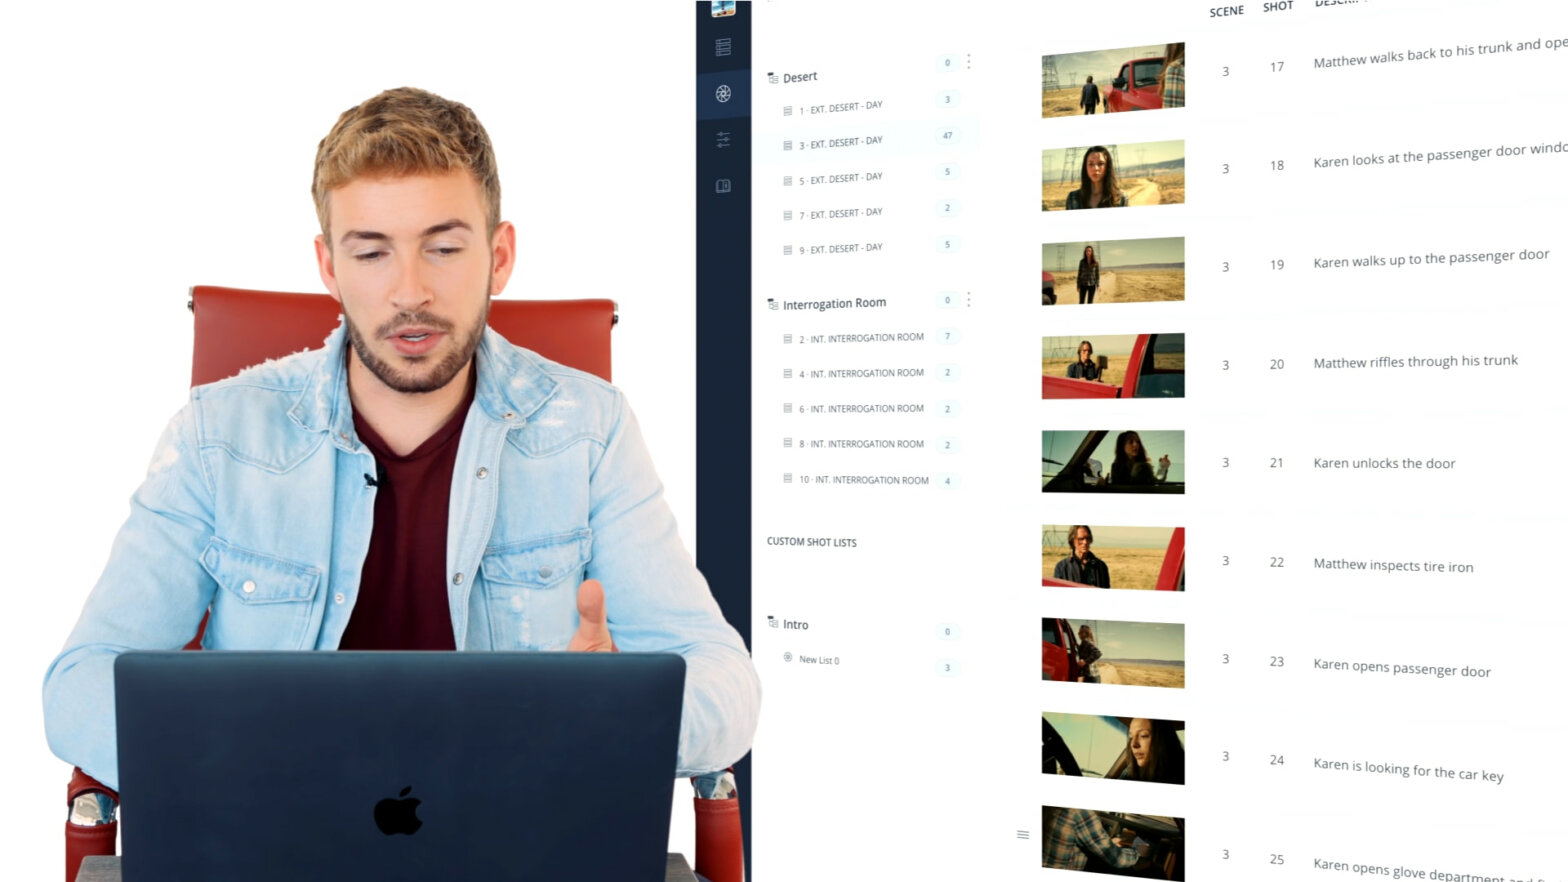
So you’re knee-deep in Pre-Production, shooting script formatted, script broken down and you’re almost done with the shot list. Then, you receive an updated version of the script, so you import that into your StudioBinder project and then all of the sudden you’re missing shots on your shot list. What happened? Well, typically that means there were some scene numbers changed, but fear not. The version history manager lets you roll back to a previous version and I’m going to show you how to recover those shots for the new version. Follow along for a step-by-step guide on how to recover shots using the version history manager.
Scene Numbers
So, why do the scene numbers matter?
Ok, you’re probably wondering why shots would be missing if scene numbers were changed. The answer is StudioBinder uses scene numbers to retain any Pre-Production work that has been done on the various pages of the project.
For example, when you tag elements during the breakdown, add shots to the shot list, or create a shooting schedule. All of this work is tied to the scene number that it was originally tagged or added to. So, if a shot is added to scene 1 but then that scene is changed to scene 1A the original scene number is no longer there, thus the shot not appearing on the shot list anymore.
Take a look at this video on How to Edit Your Screenplay which touches on the importance of scene numbers.
How to edit your screenplay • Subscribe on YouTube
Alright, with the importance of scene numbers hammered in, let’s get to the how of recovering shots on the shot list.
Project Overview Page
Step 1: Go to shot lists & storyboards
Ok, so anytime a script is imported or synced to the project, a new version is added to the version history manager. This allows you to roll back to a previous version or remove them if needed.
Since we’re looking to recover shots we’ll need to head over to the shot lists & storyboards page. So, from the project overview page, click on the icon that looks like a camera shutter.
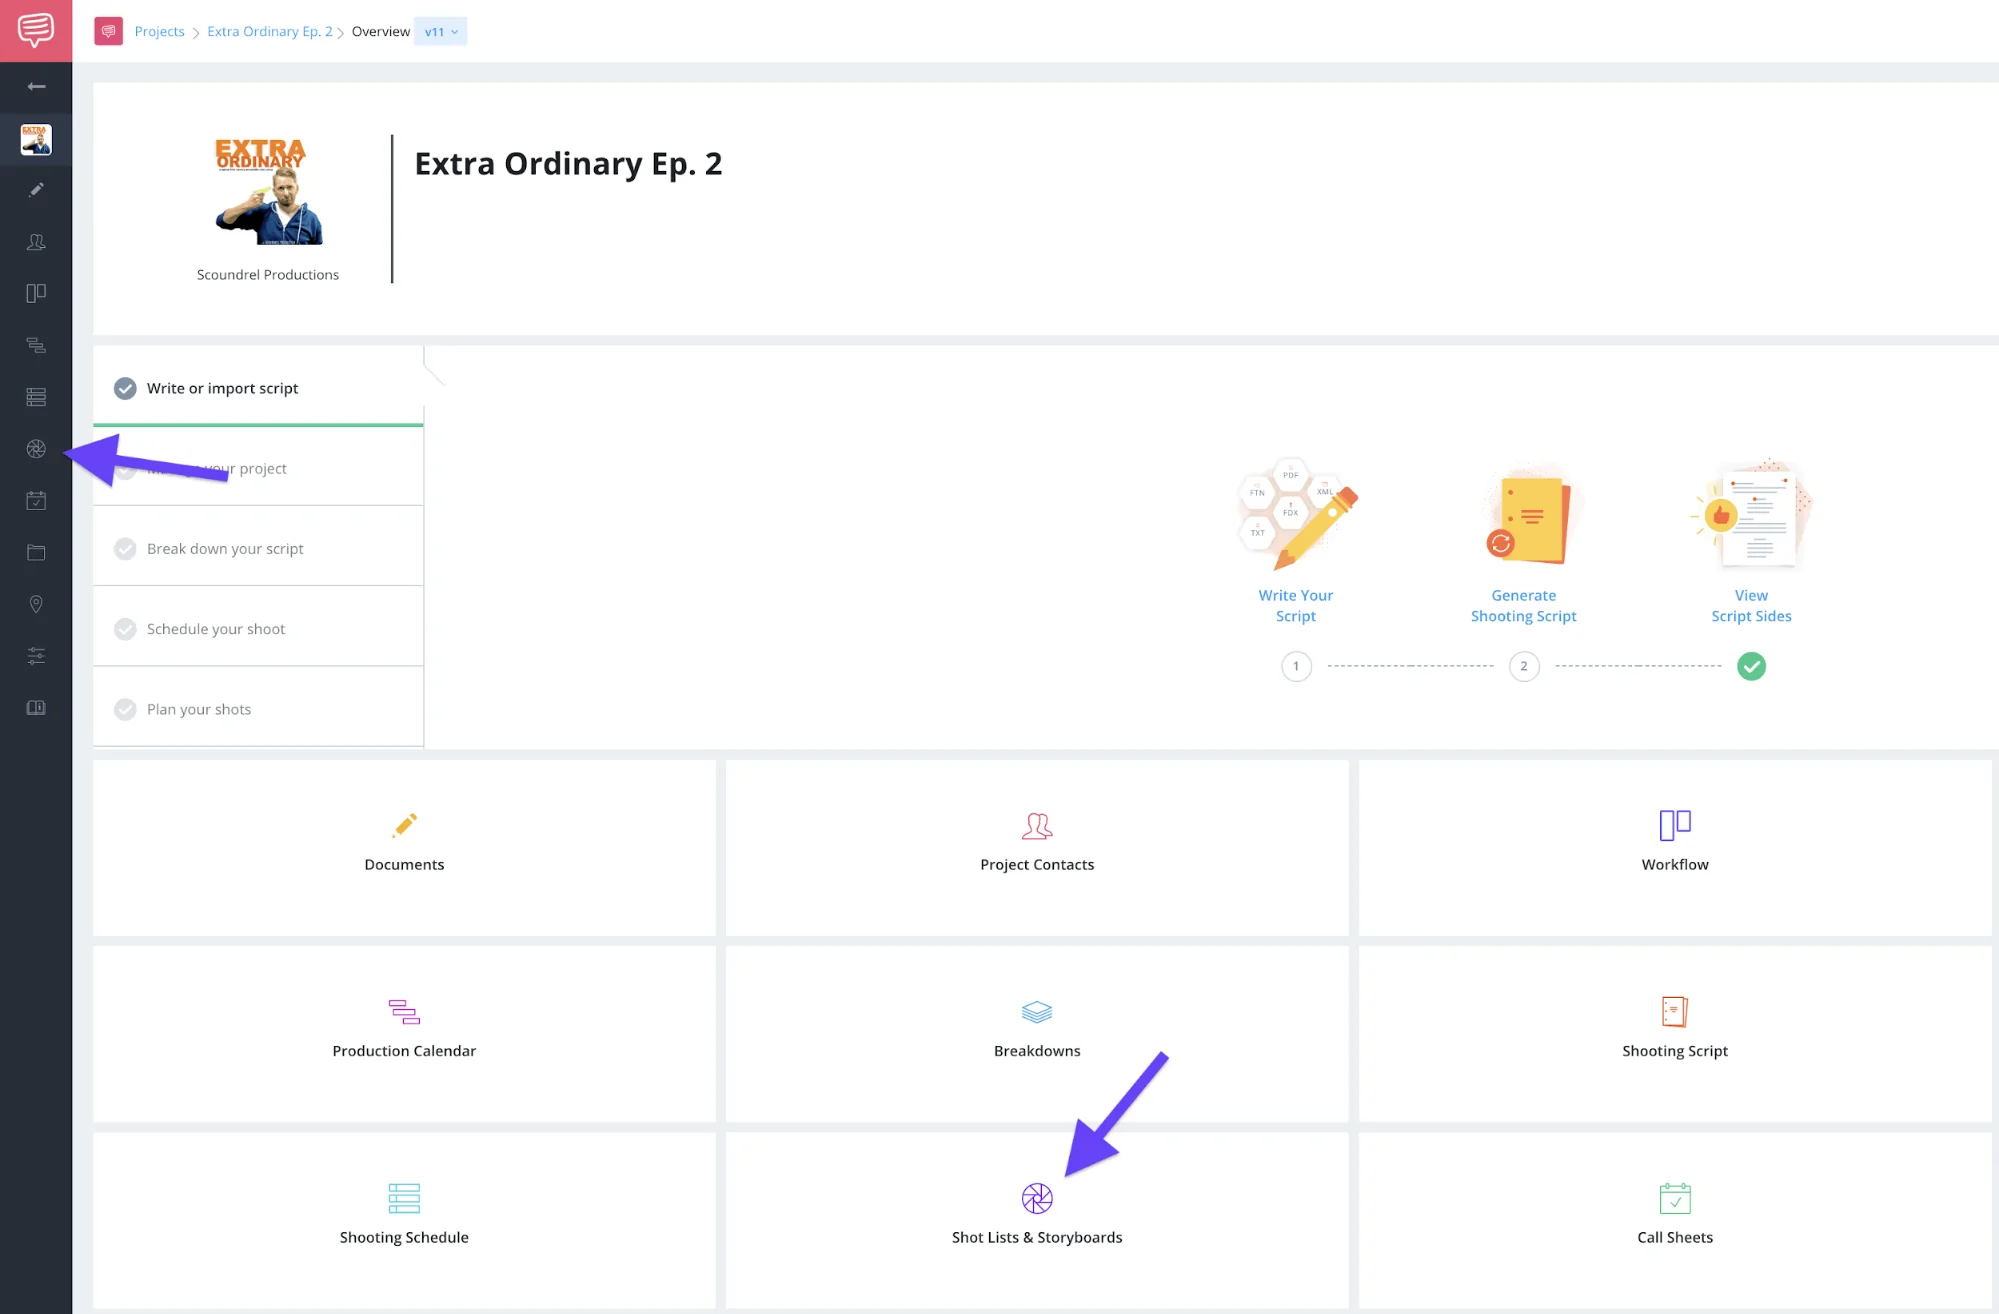
Project overview page • Click shot lists & storyboards
This opens the shot lists & storyboards page and takes us to step two...
Shot Lists & Storyboards Page
Step 2: Roll back to previous version
Now, in the newest version of my script, Scene 7 was changed to Scene 6A. Like we learned earlier, that means that those shots are now not going to be “missing” because the scene they were added to is gone. So, we’ll want to jump back a version using the version manager. You’ll see the version you’re currently on at the top of the page.
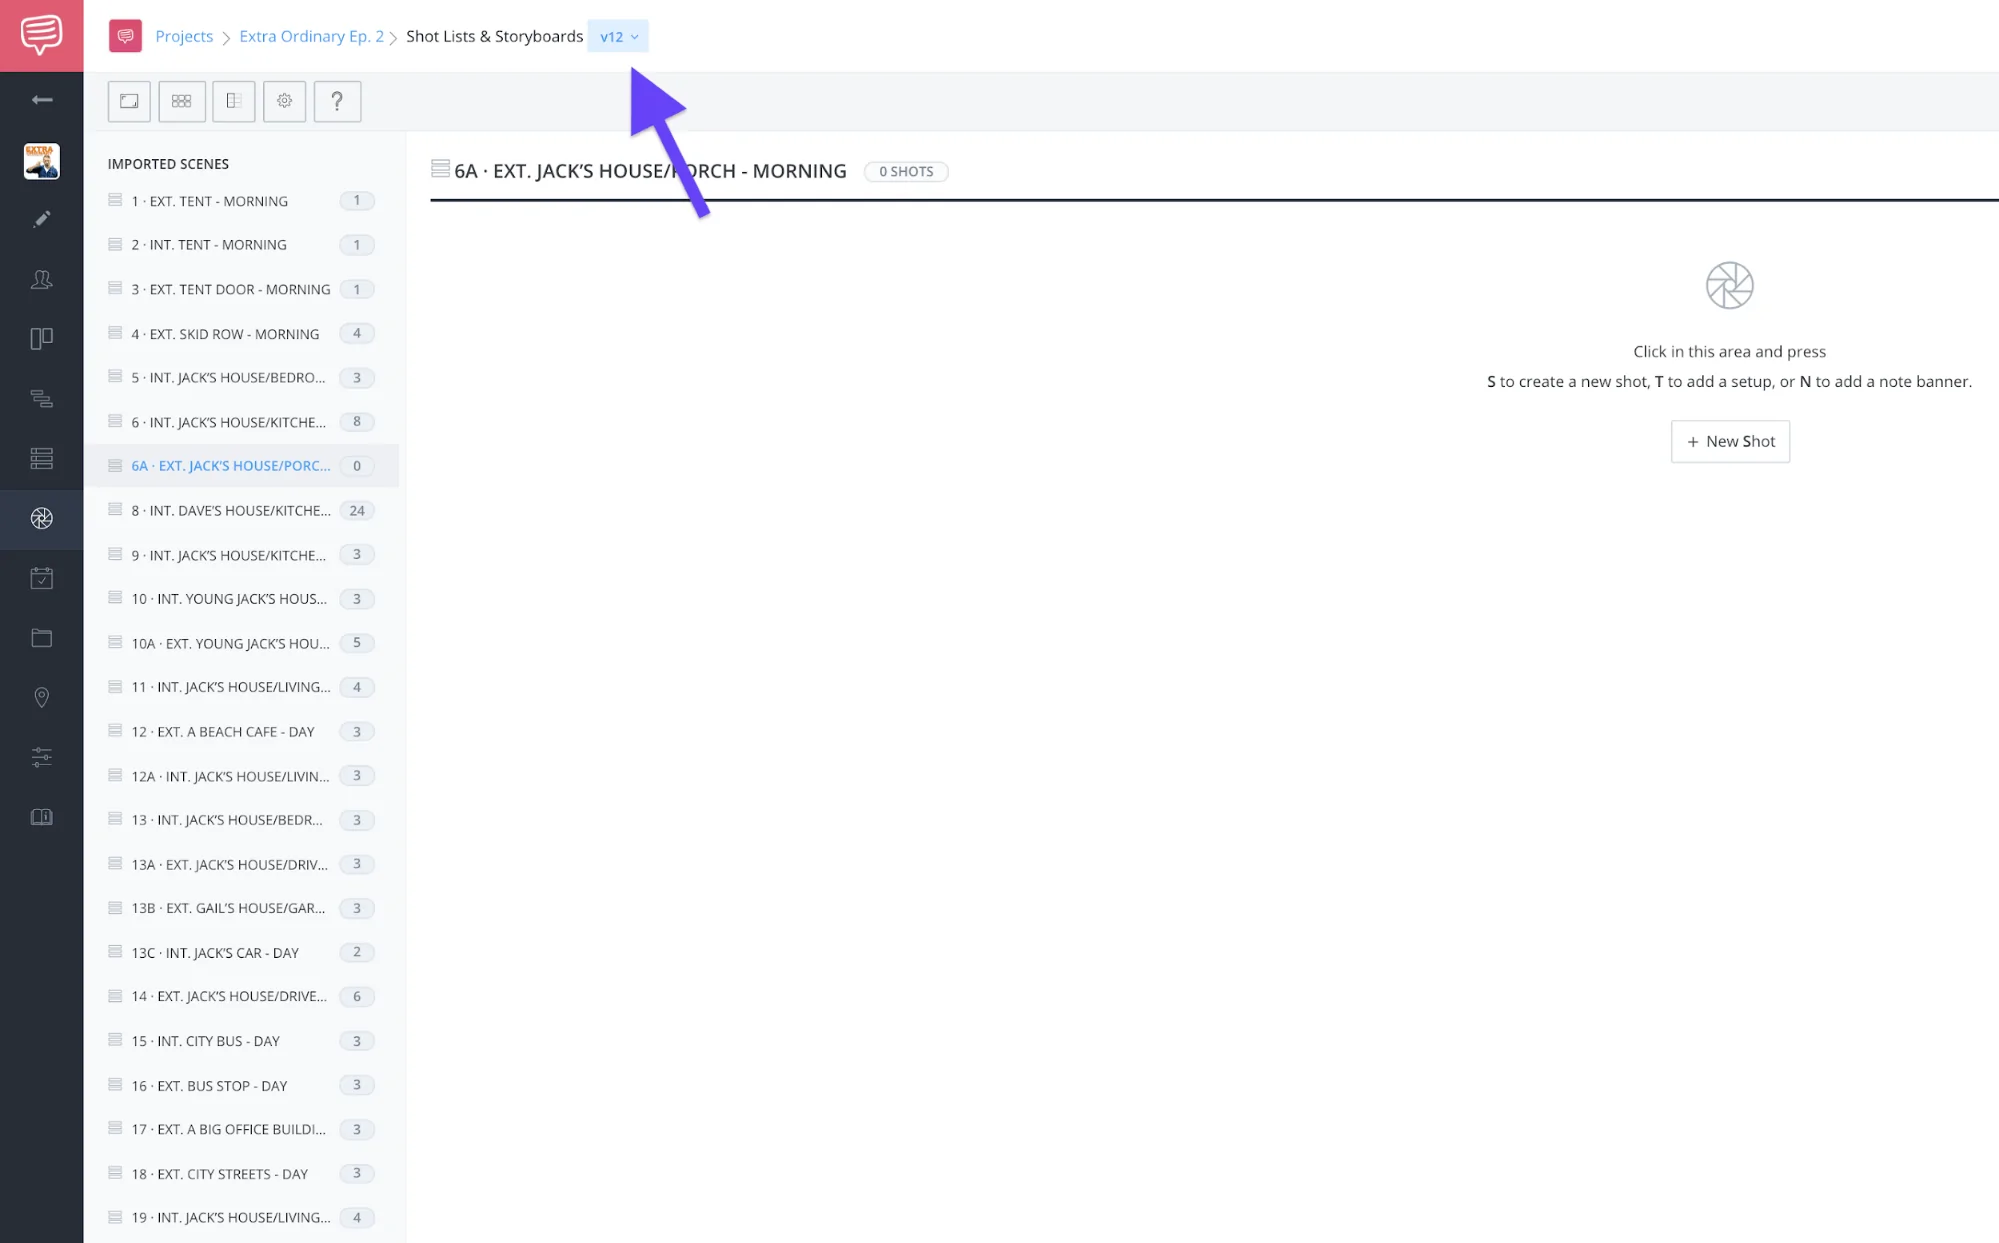
Shot lists & storyboards page • Current script version
To open the version manager click on the drop down arrow and the version manager will appear on your screen. You’ll click on make current for the previous version of the script. In my case, that would be v11 since the newest version is v12.
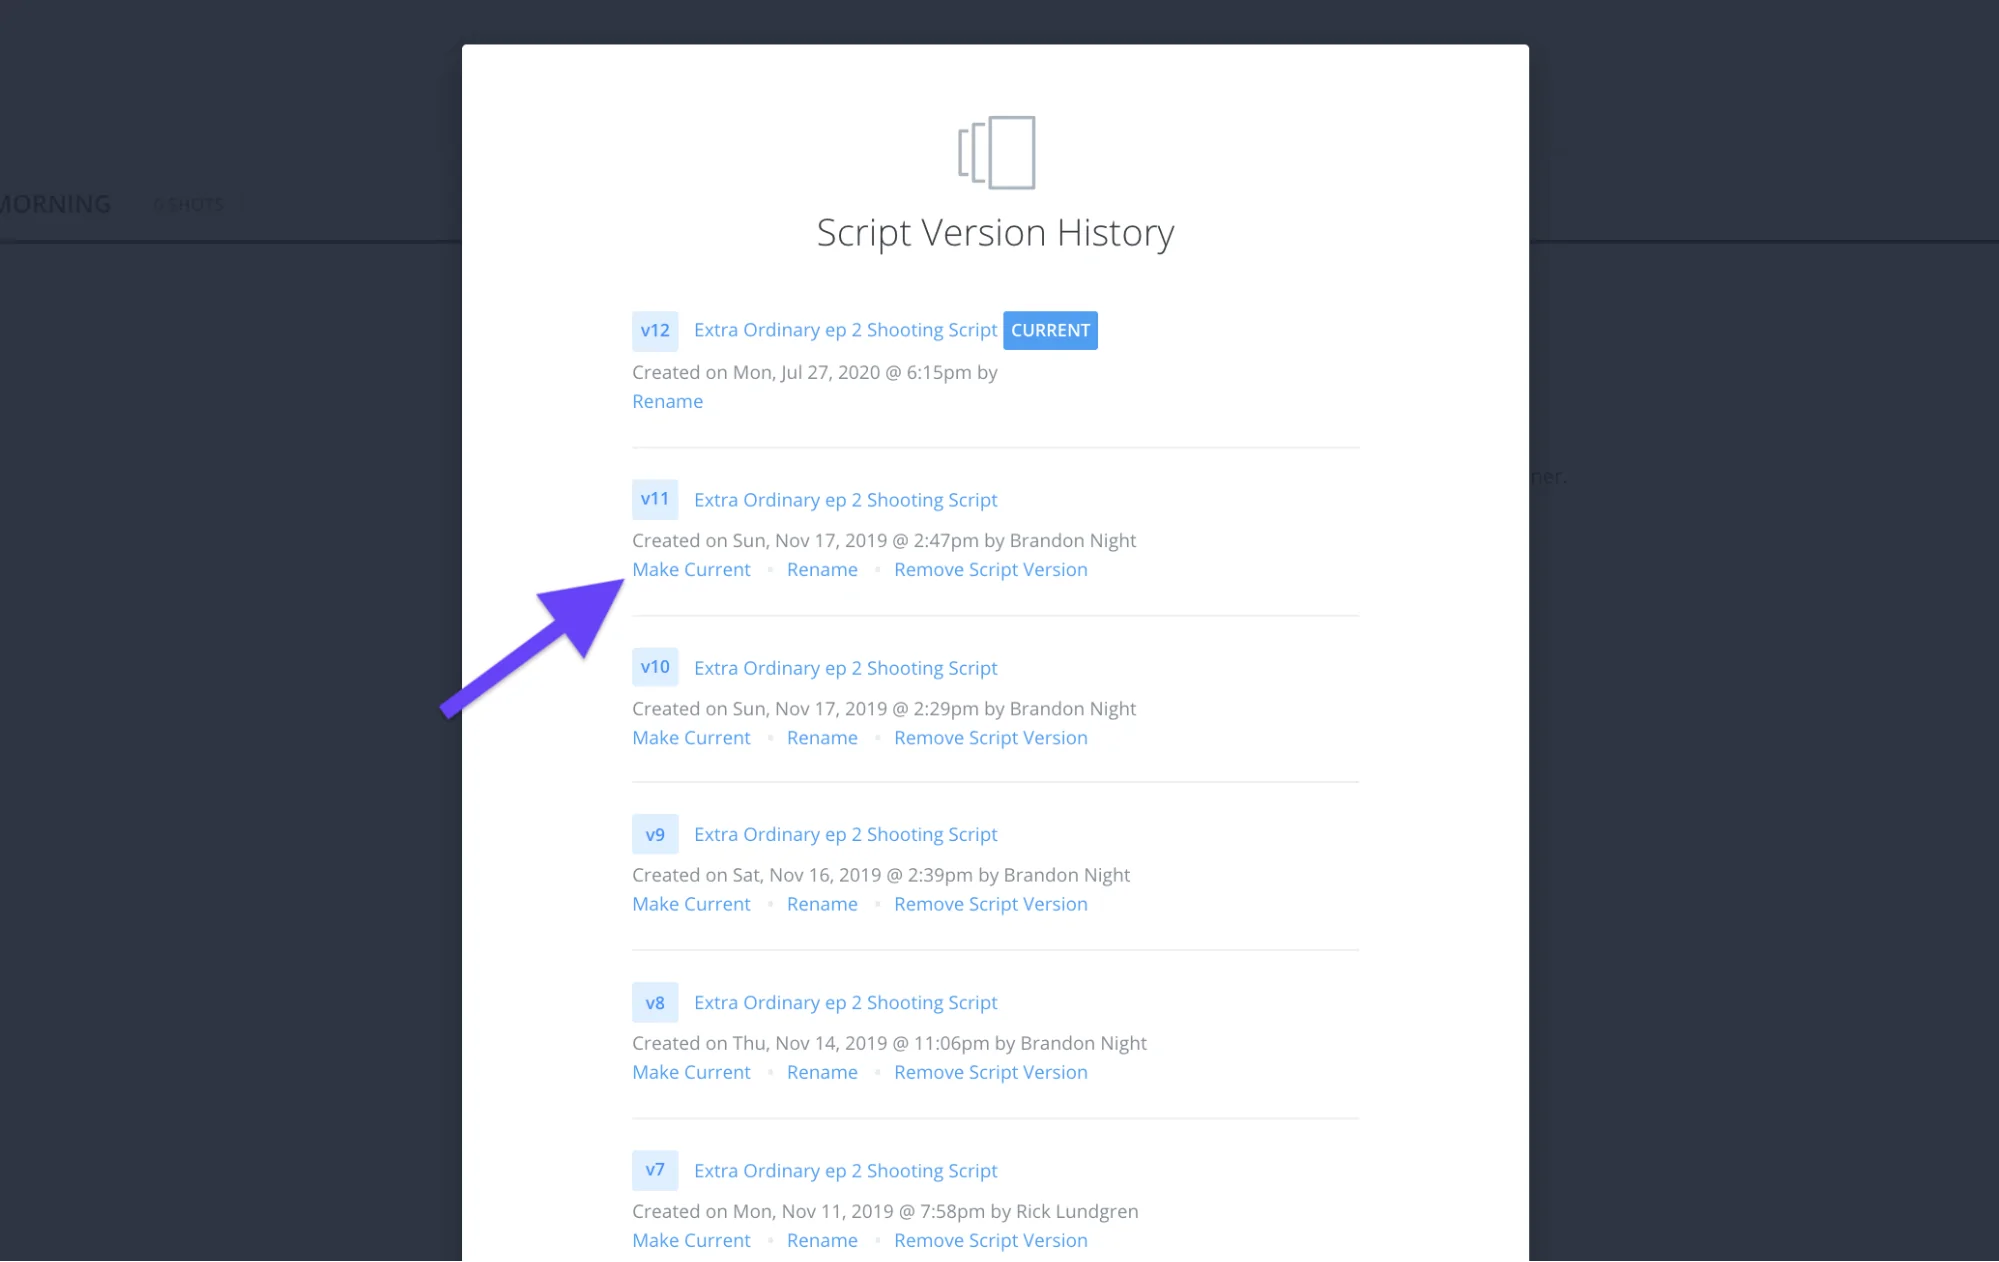
Version history manager • Click make current
So, now you can see that I have Scene 7 once again and there are 14 shots when the newest version there were zero shots in Scene 6A.
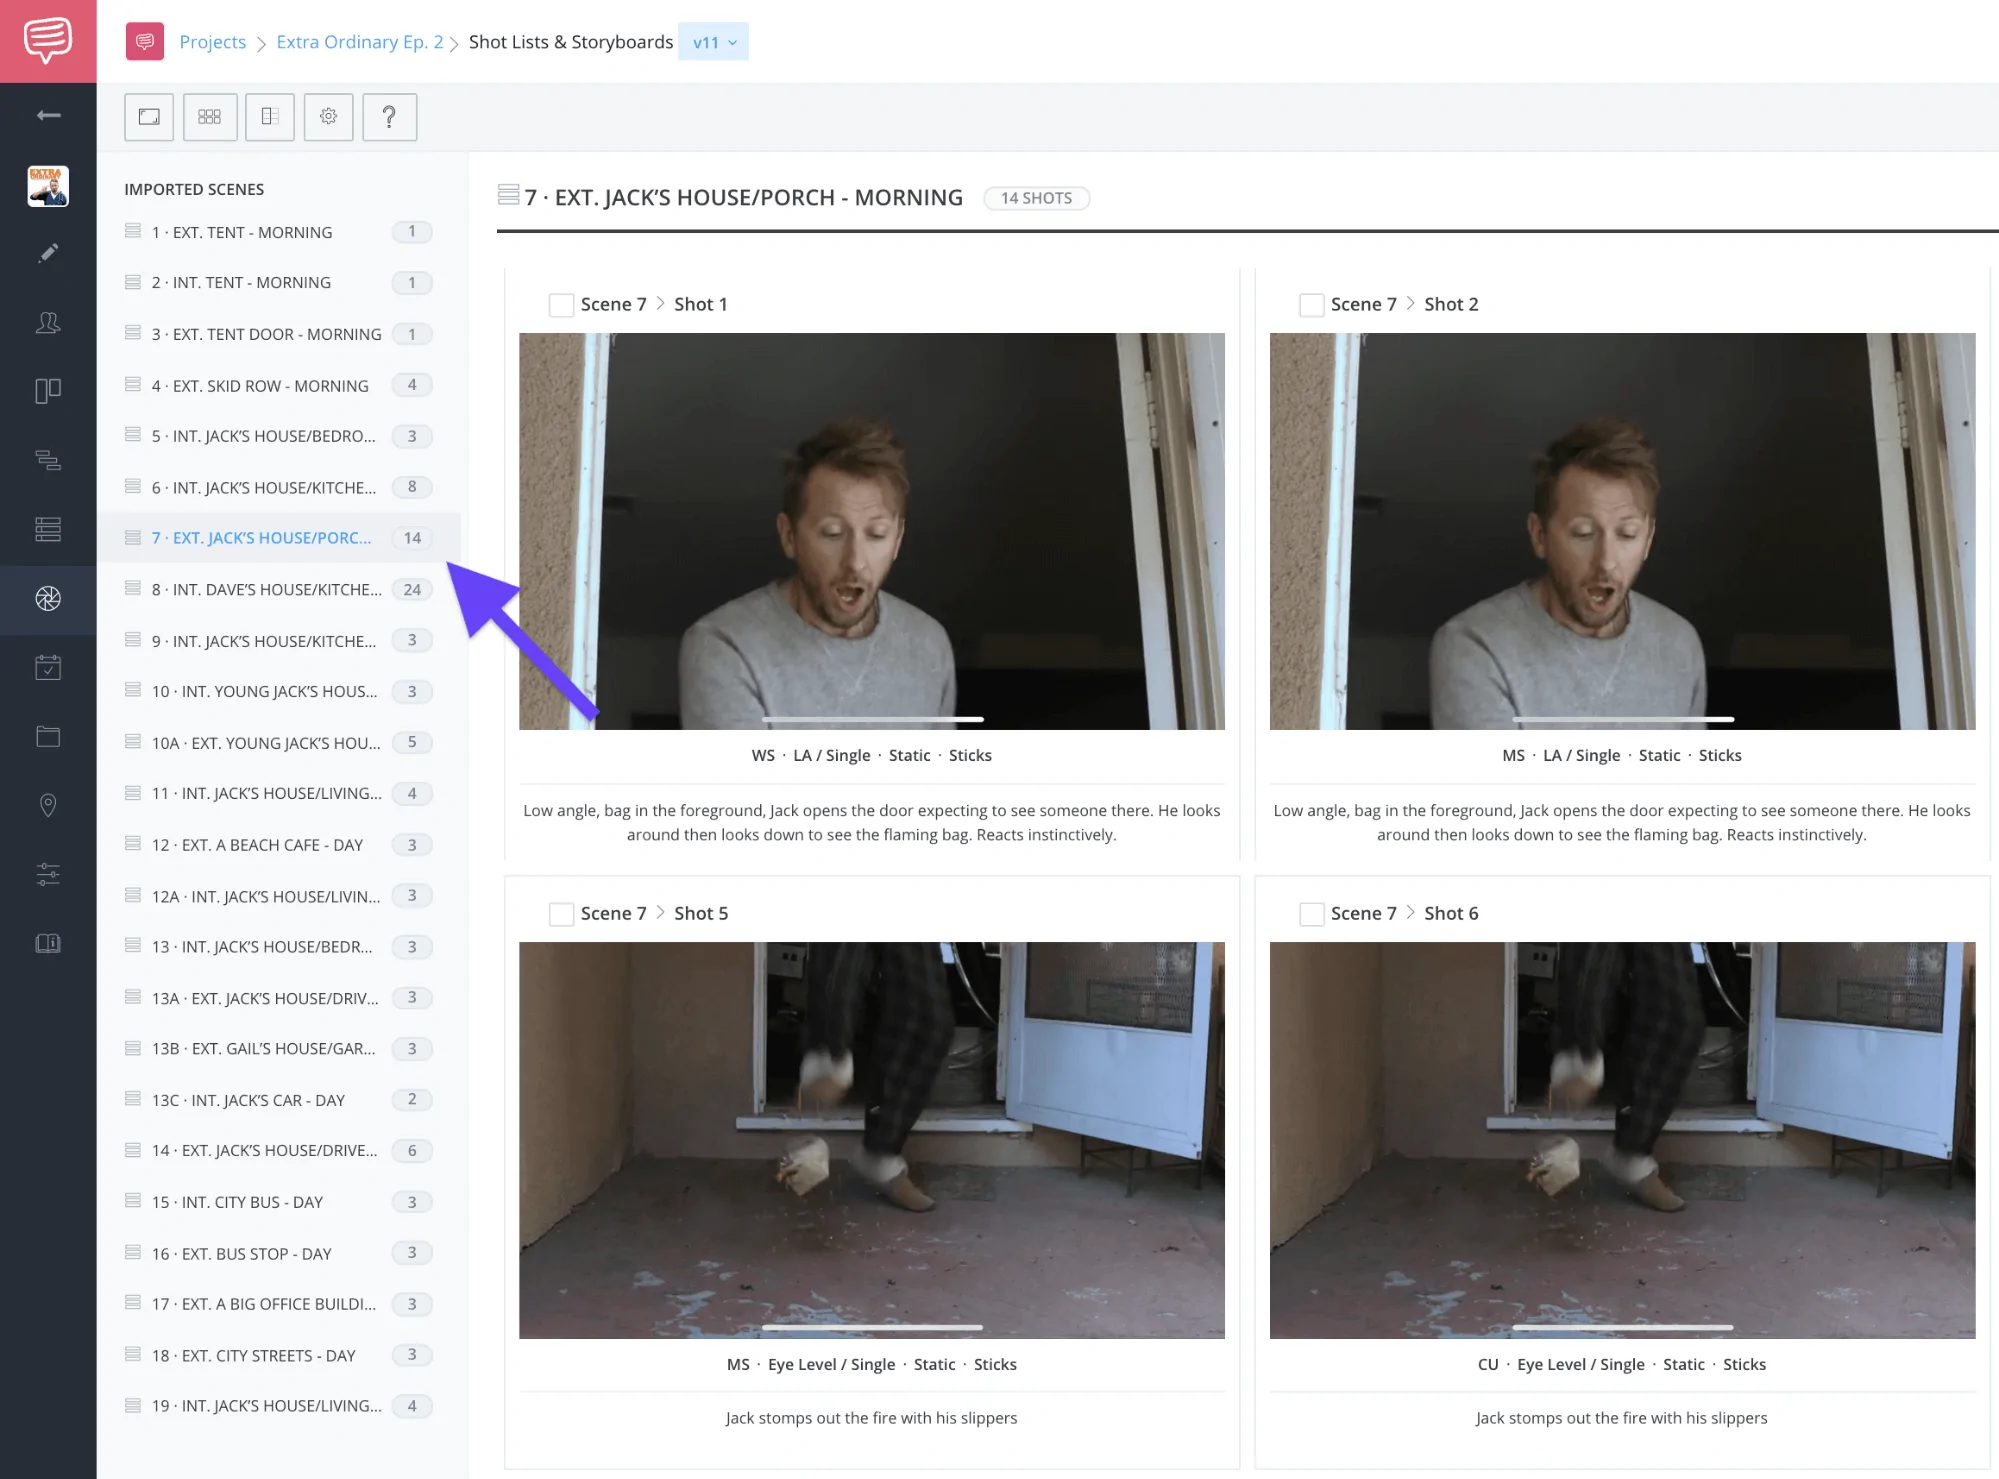
Previous script version • Scene 7 shots
Now, this brings us to the next step...
Custom Shot List
Step 3: Duplicate the list
Alright, as we learned earlier, it’s important to keep your scene numbers consistent so all of your production planning work is retained. However, there is a little trick to retain shots even if a scene number is changed. Duplicate the list.
To duplicate the list, click on the More button to the right of the list you’d like to duplicate and then click Duplicate List.
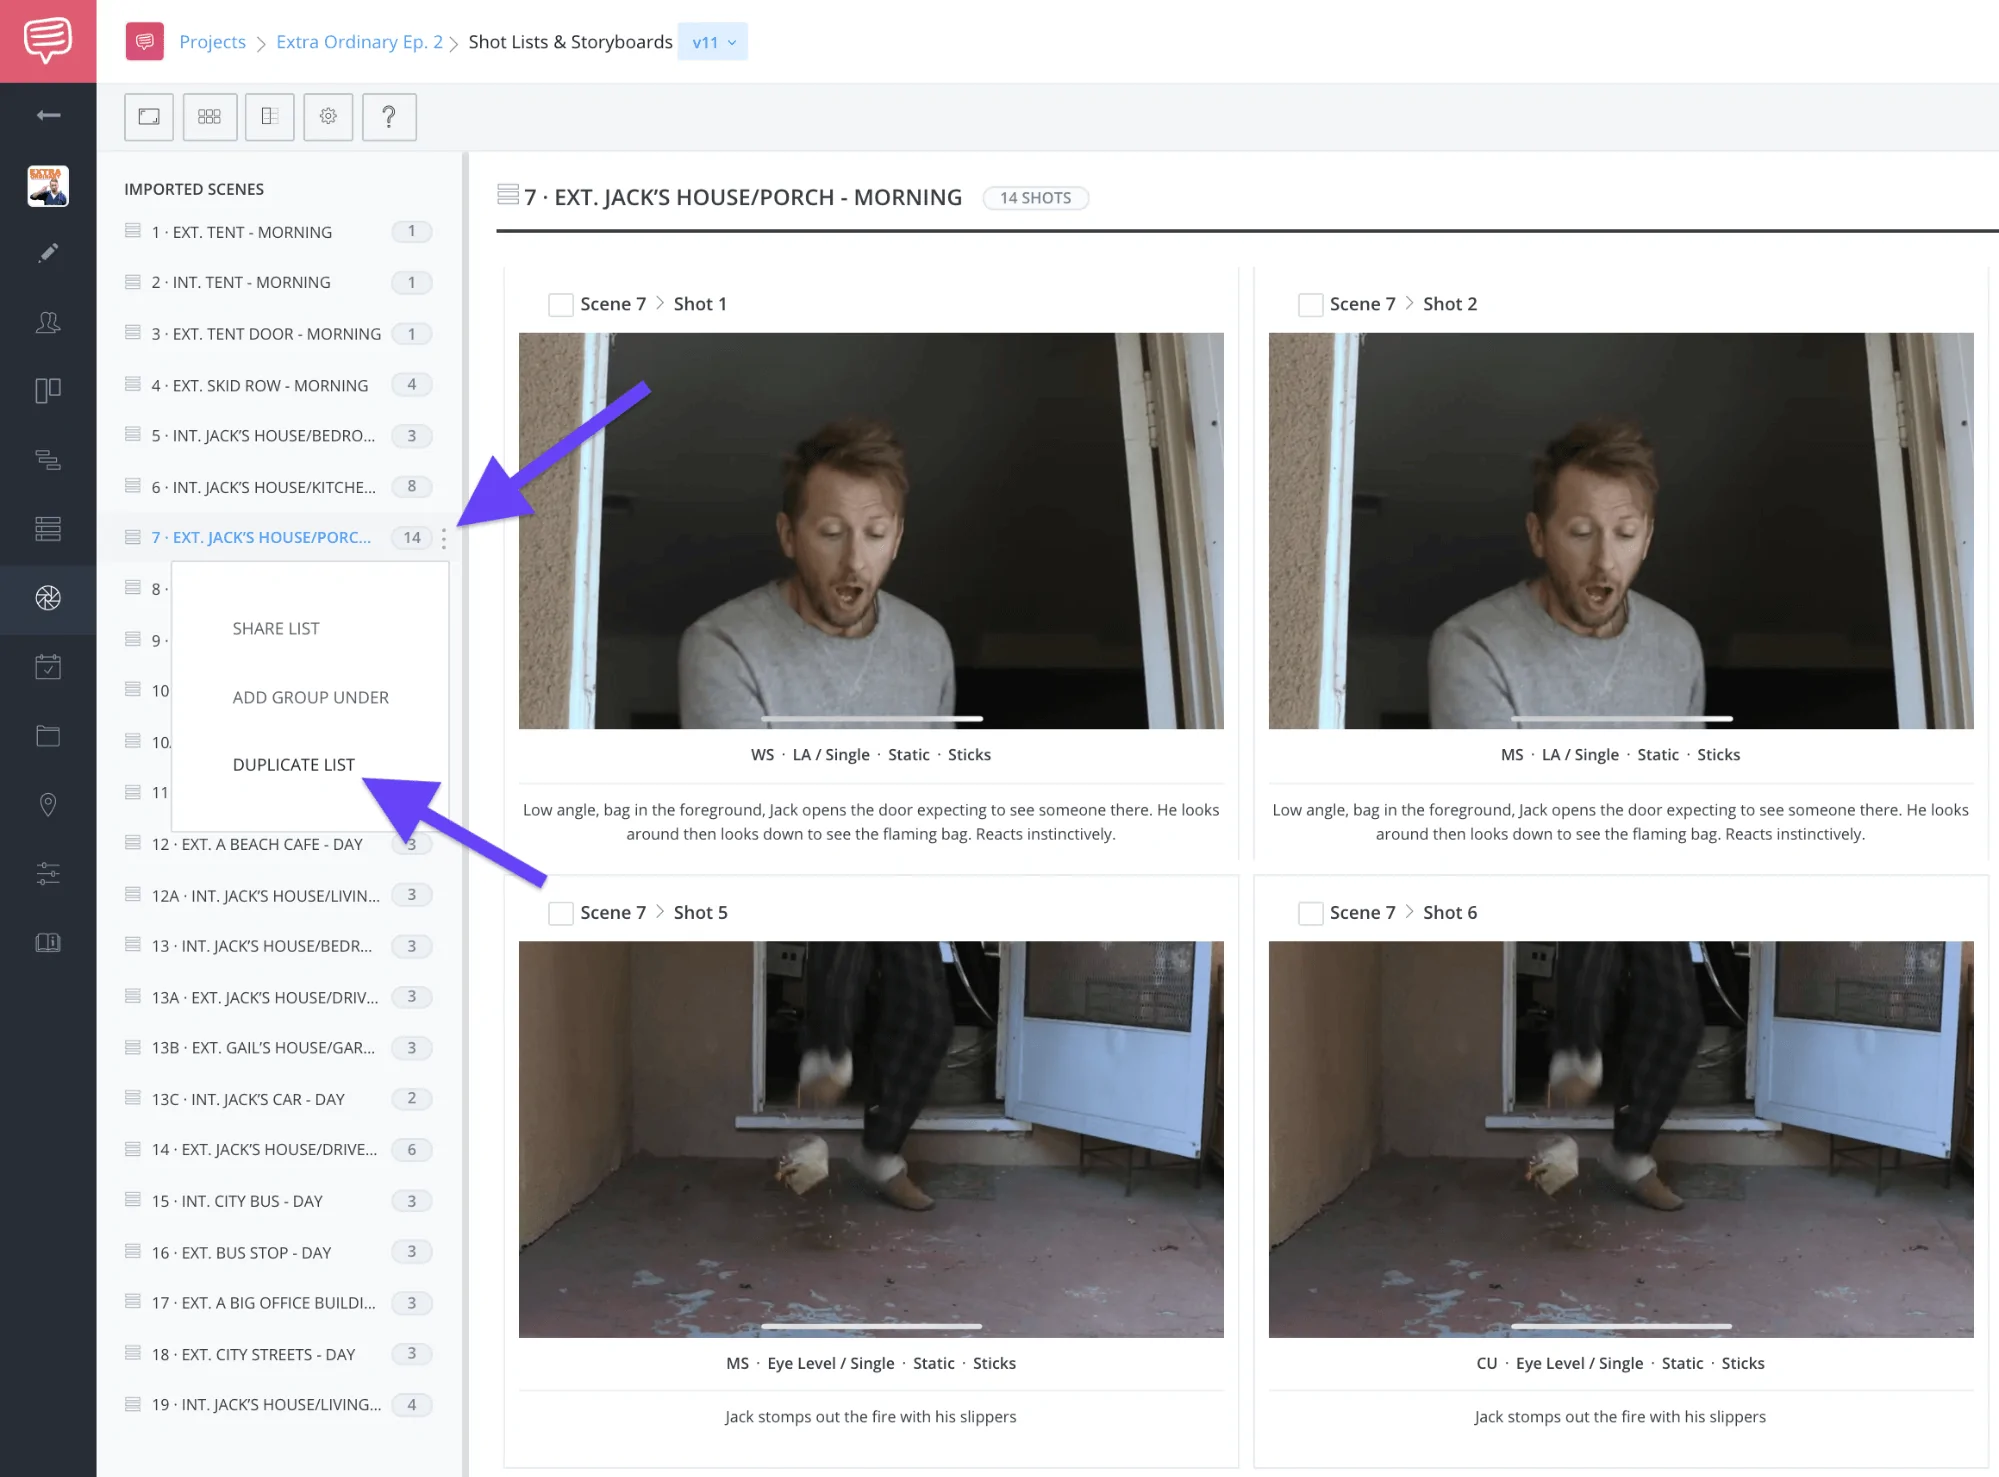
More menu • Click duplicate list
This will create a custom shot list with the exact shots from that list that isn’t tied to the script that is imported.
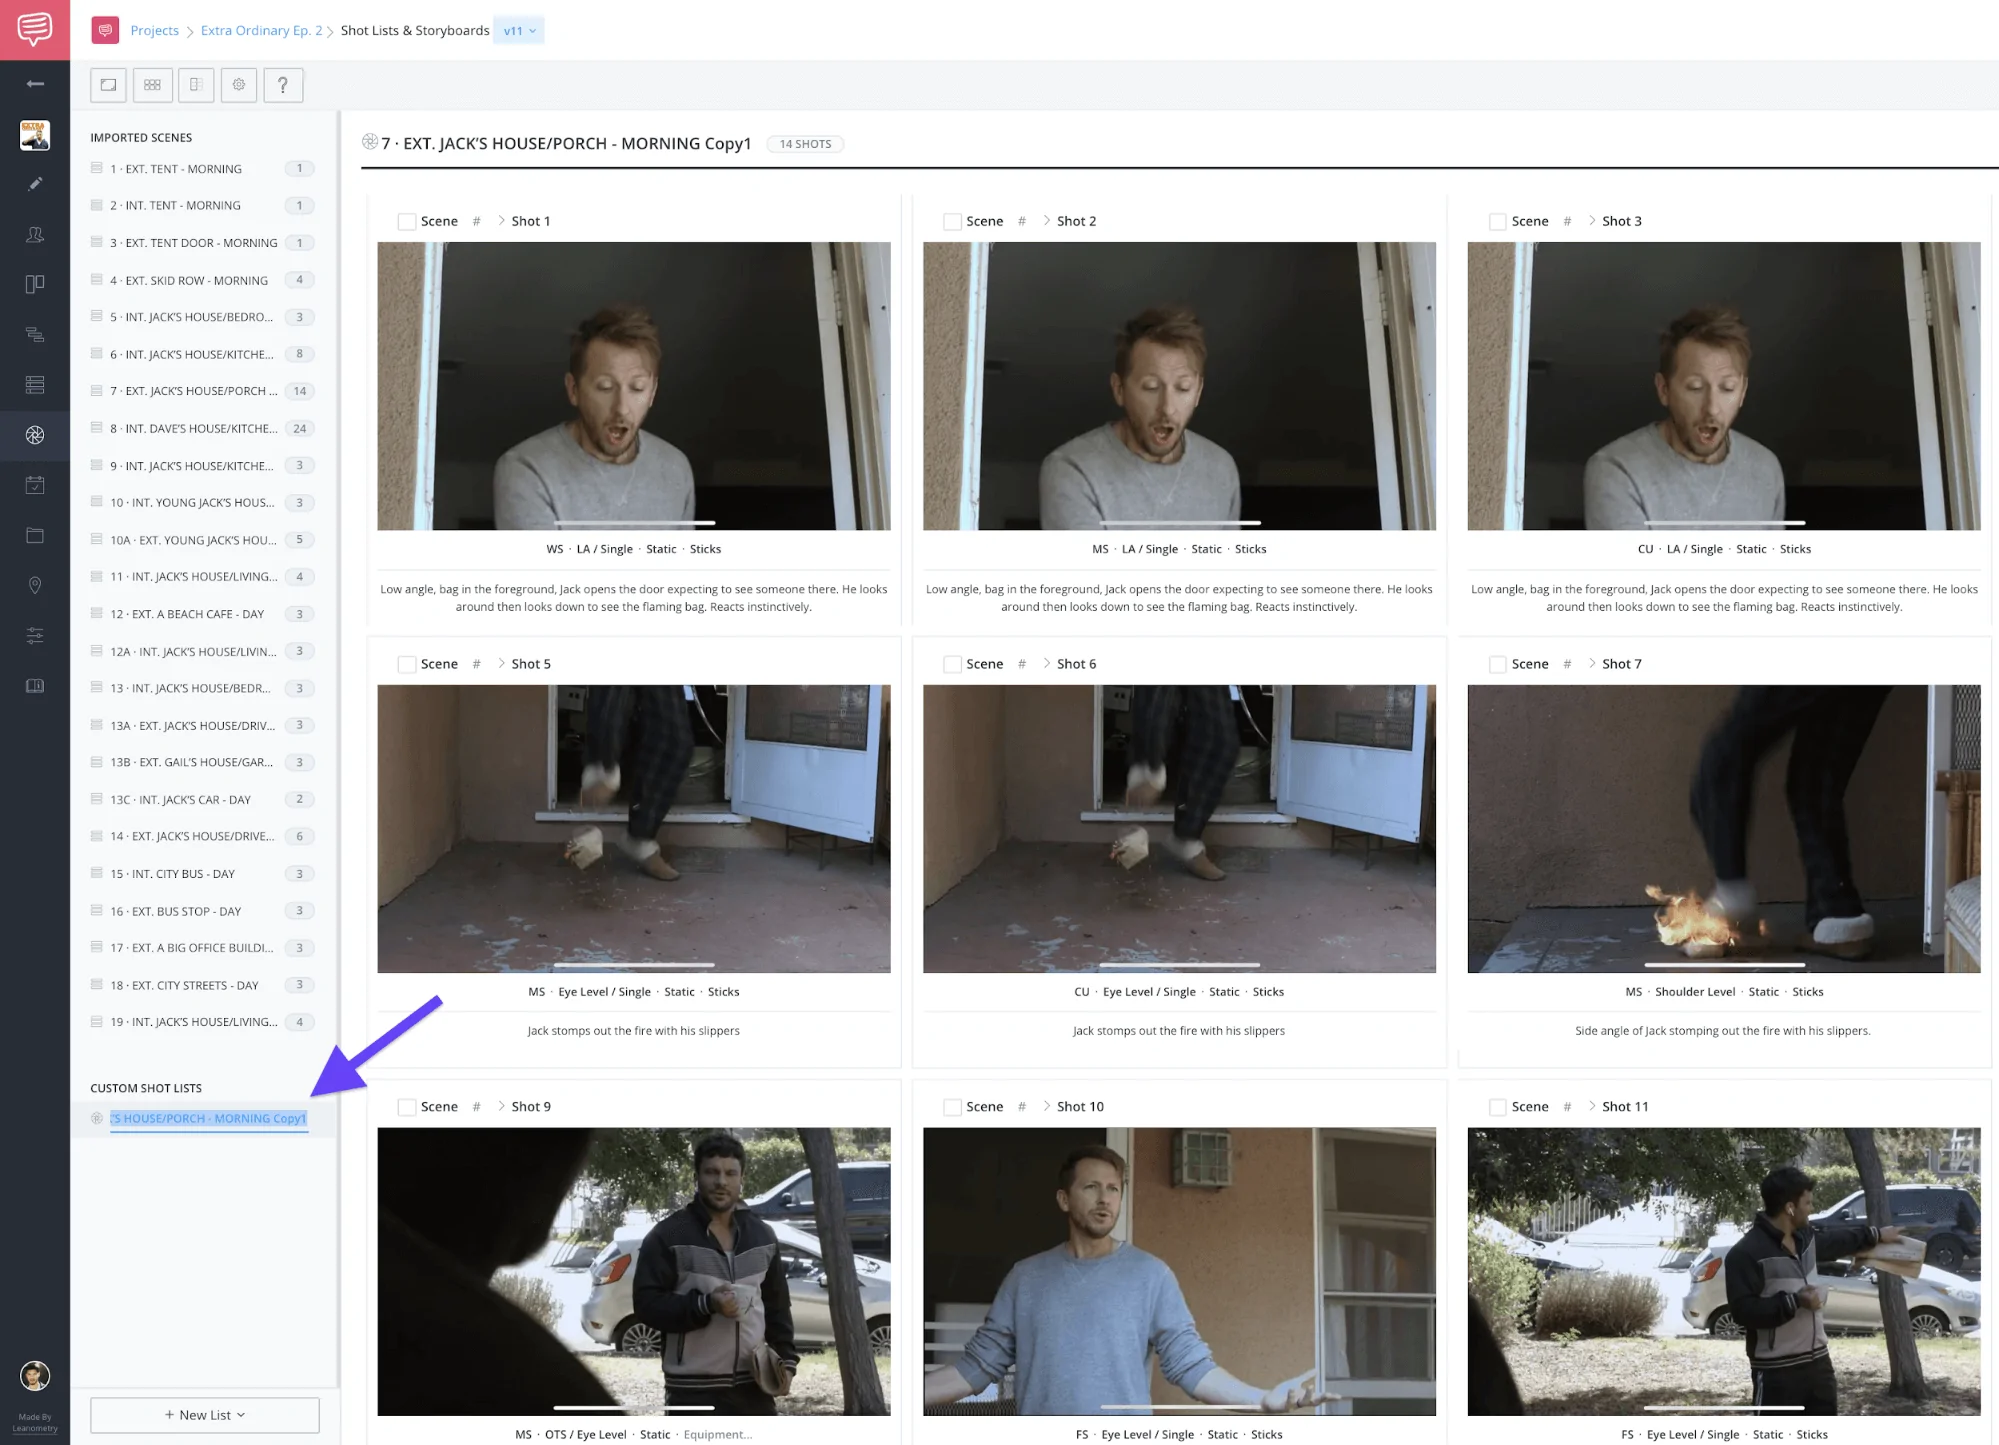
Custom shot list • Duplicated list
You can then use the version manager to go back to the newest version of the script and the duplicated list will be there.
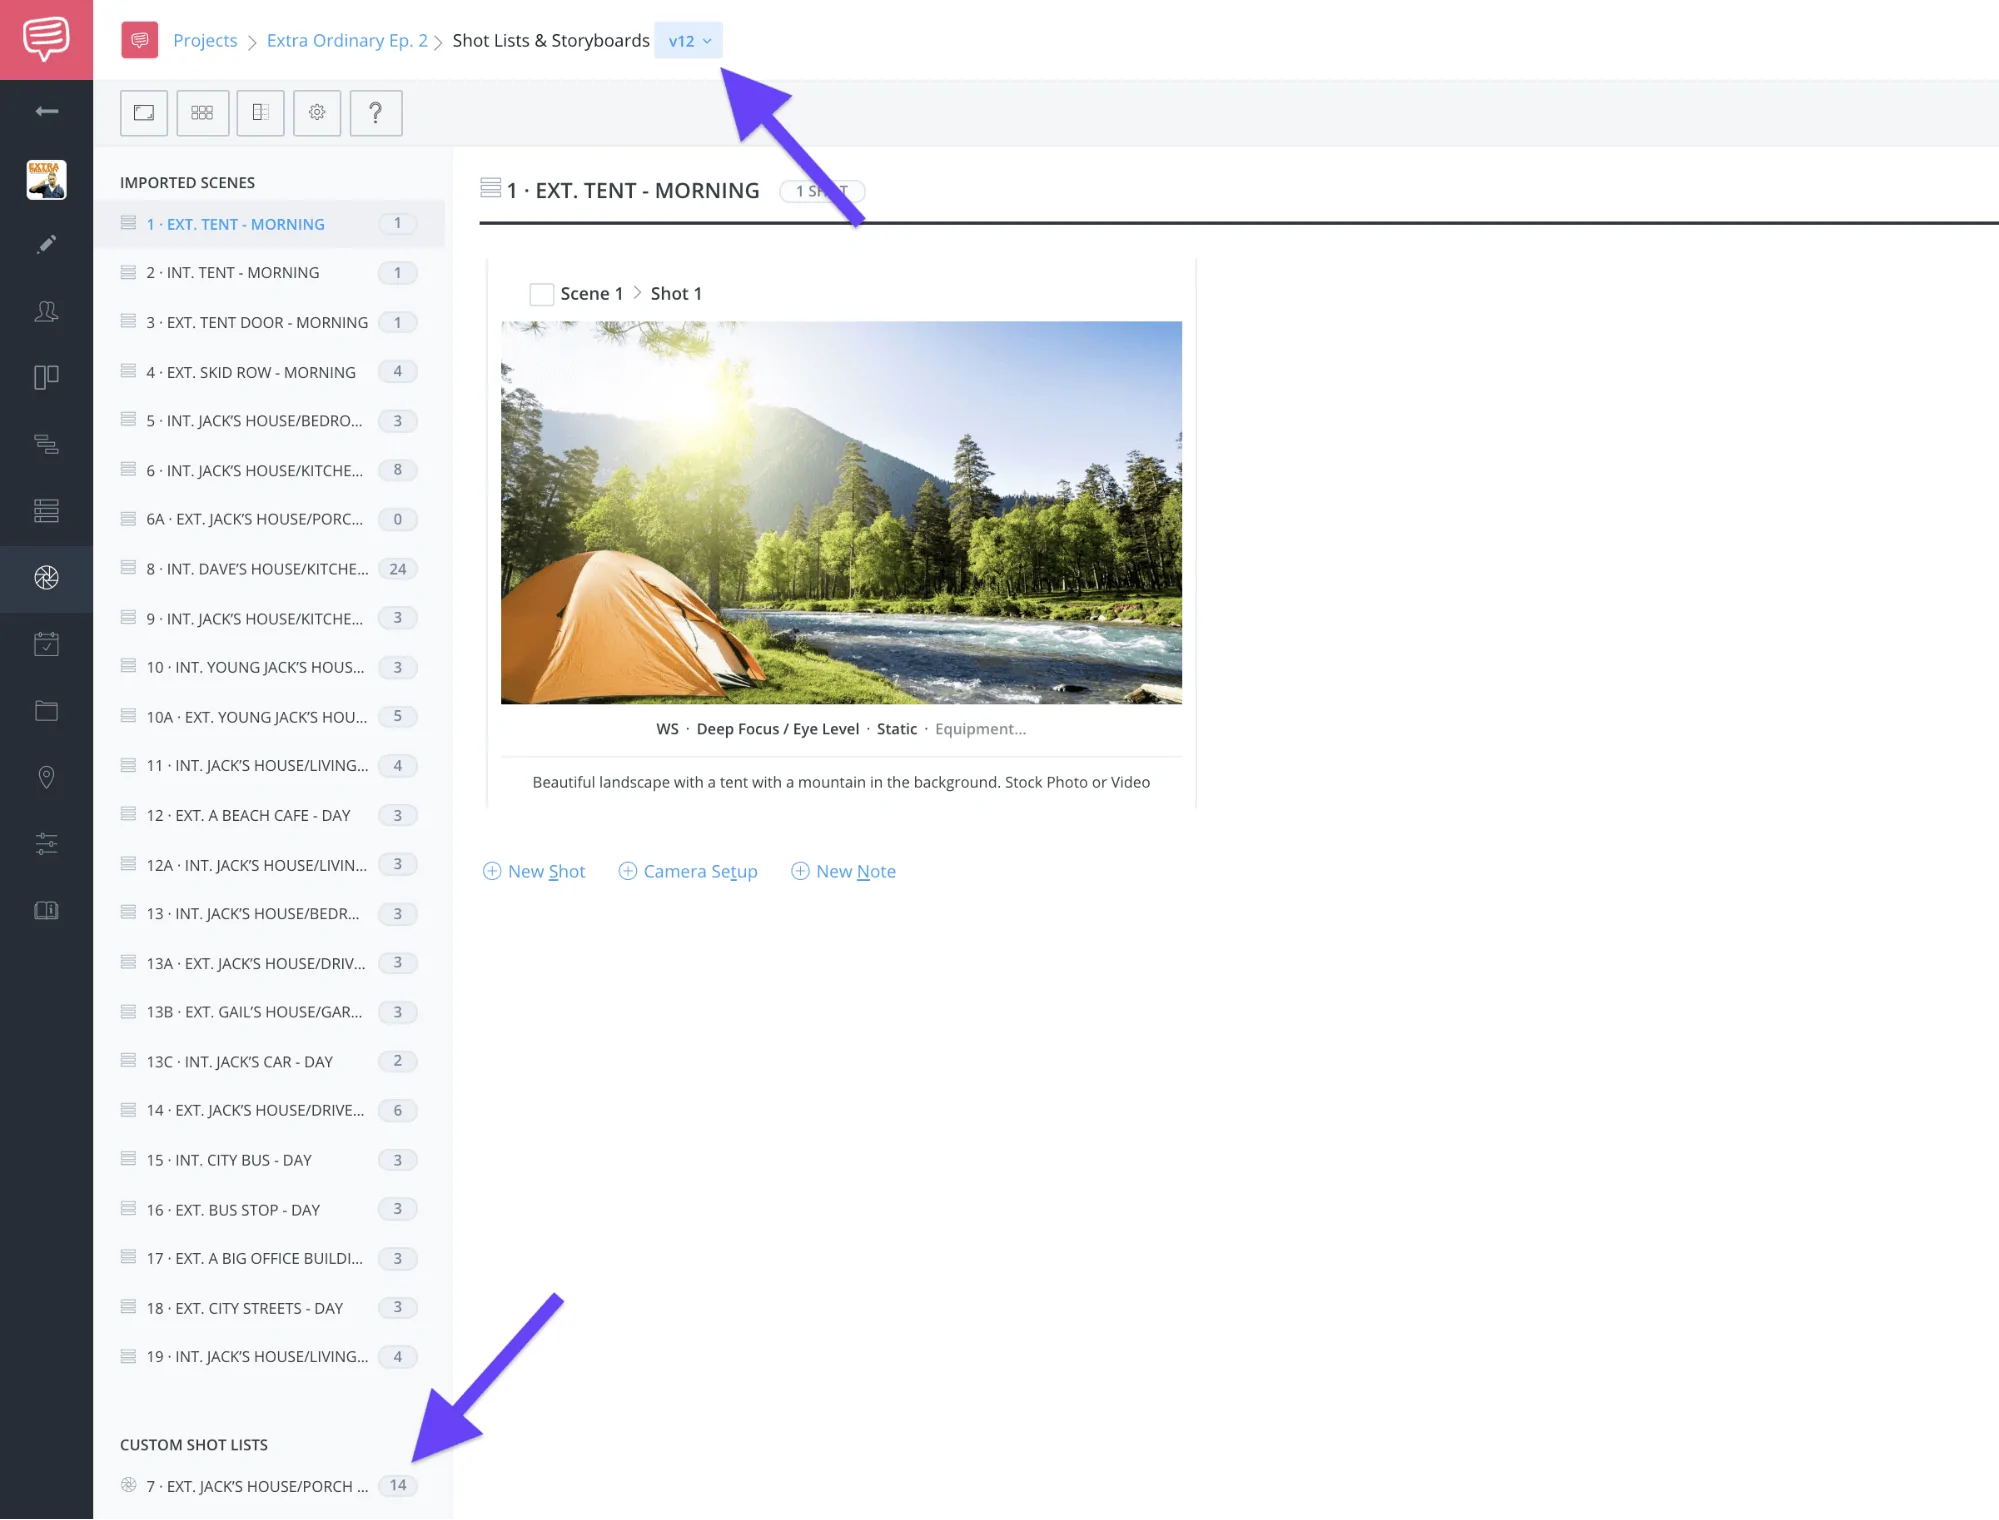
Newest script version • Duplicated list
This leads us to the final step…
Move Shots
Step 4: Move the shots
So, now that we have the shots in the newest version of the script we’ll need to move them where they’re supposed to be. Again, in my case that would be to Scene 6A.
First, select the custom list on the sidebar, then select all of the shots by clicking Select All.
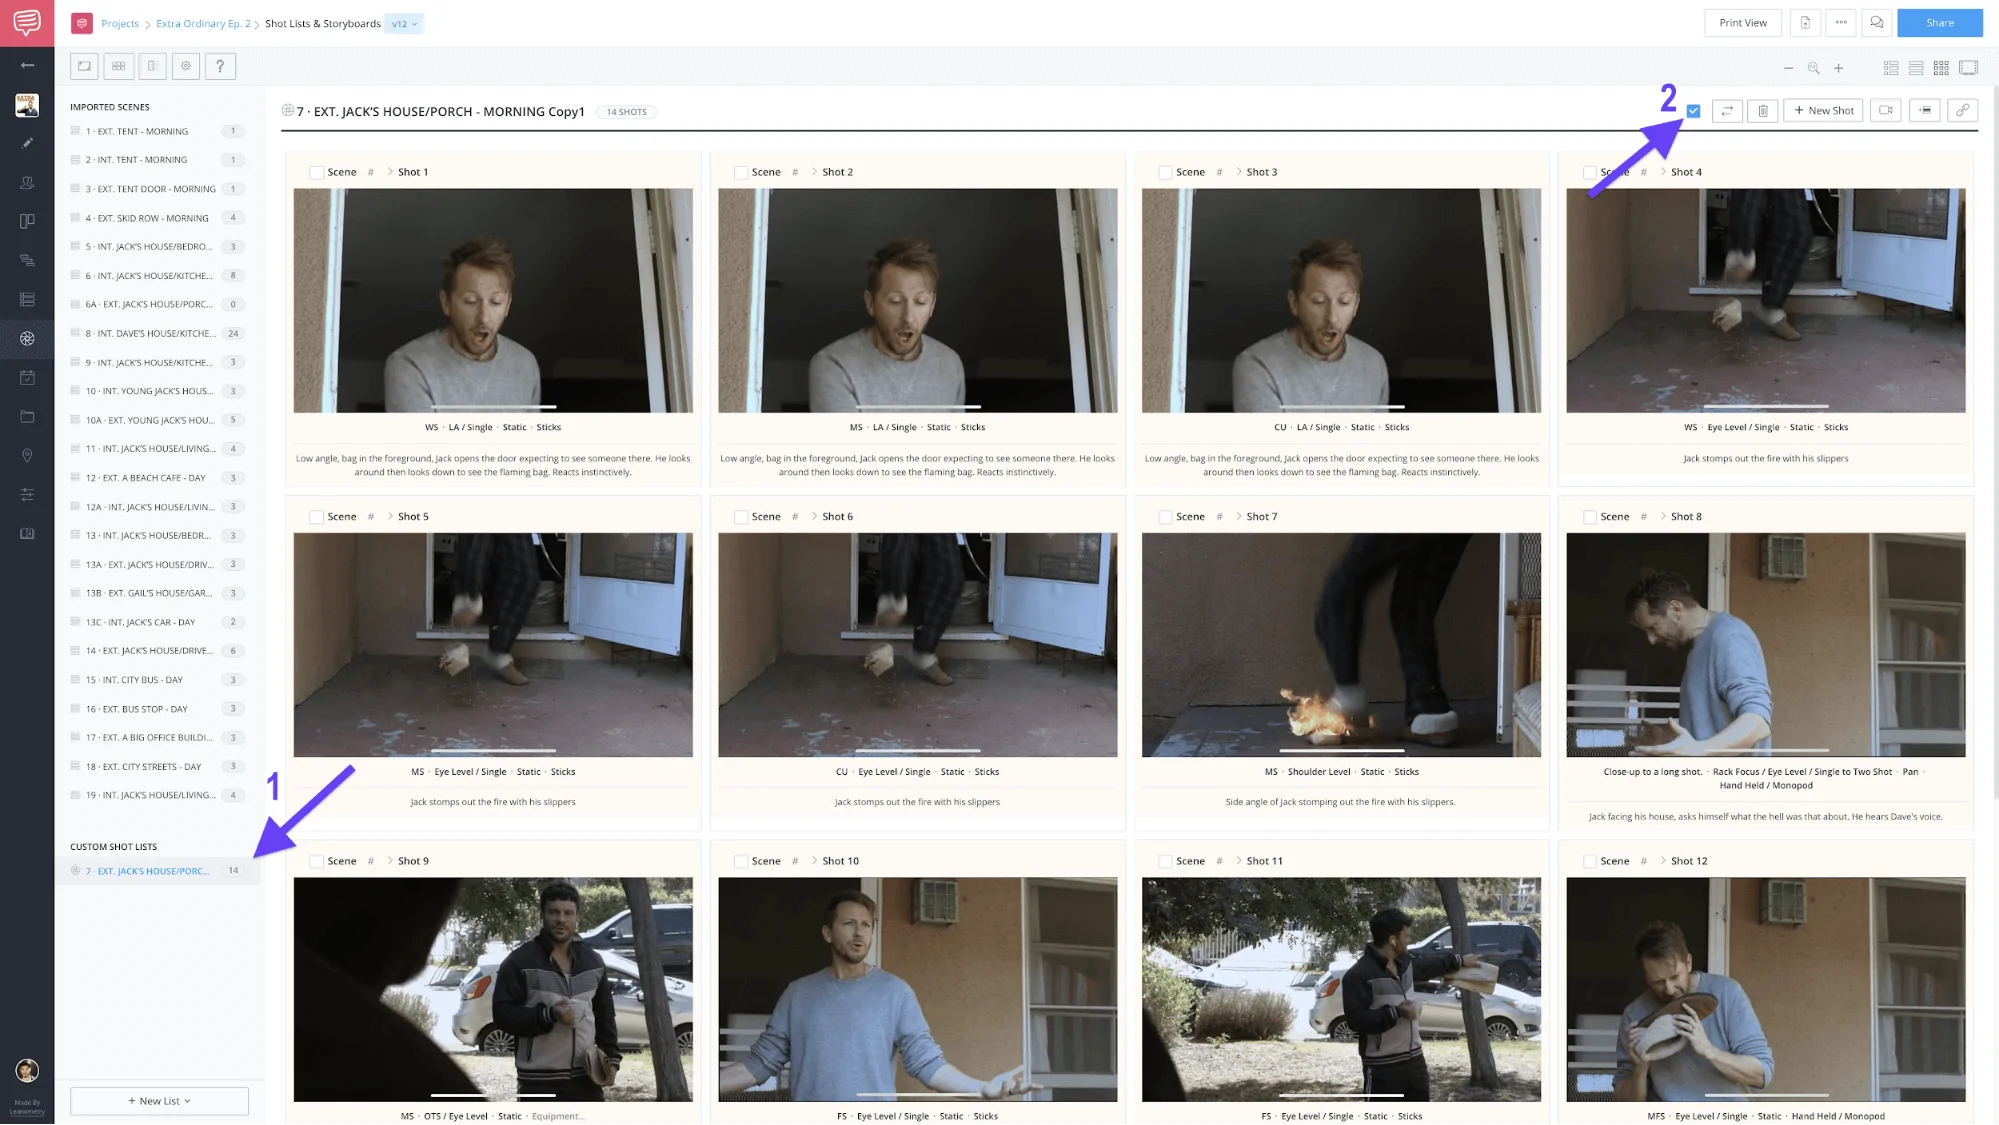
Select custom shot list • Click select all
Now, click the move button...
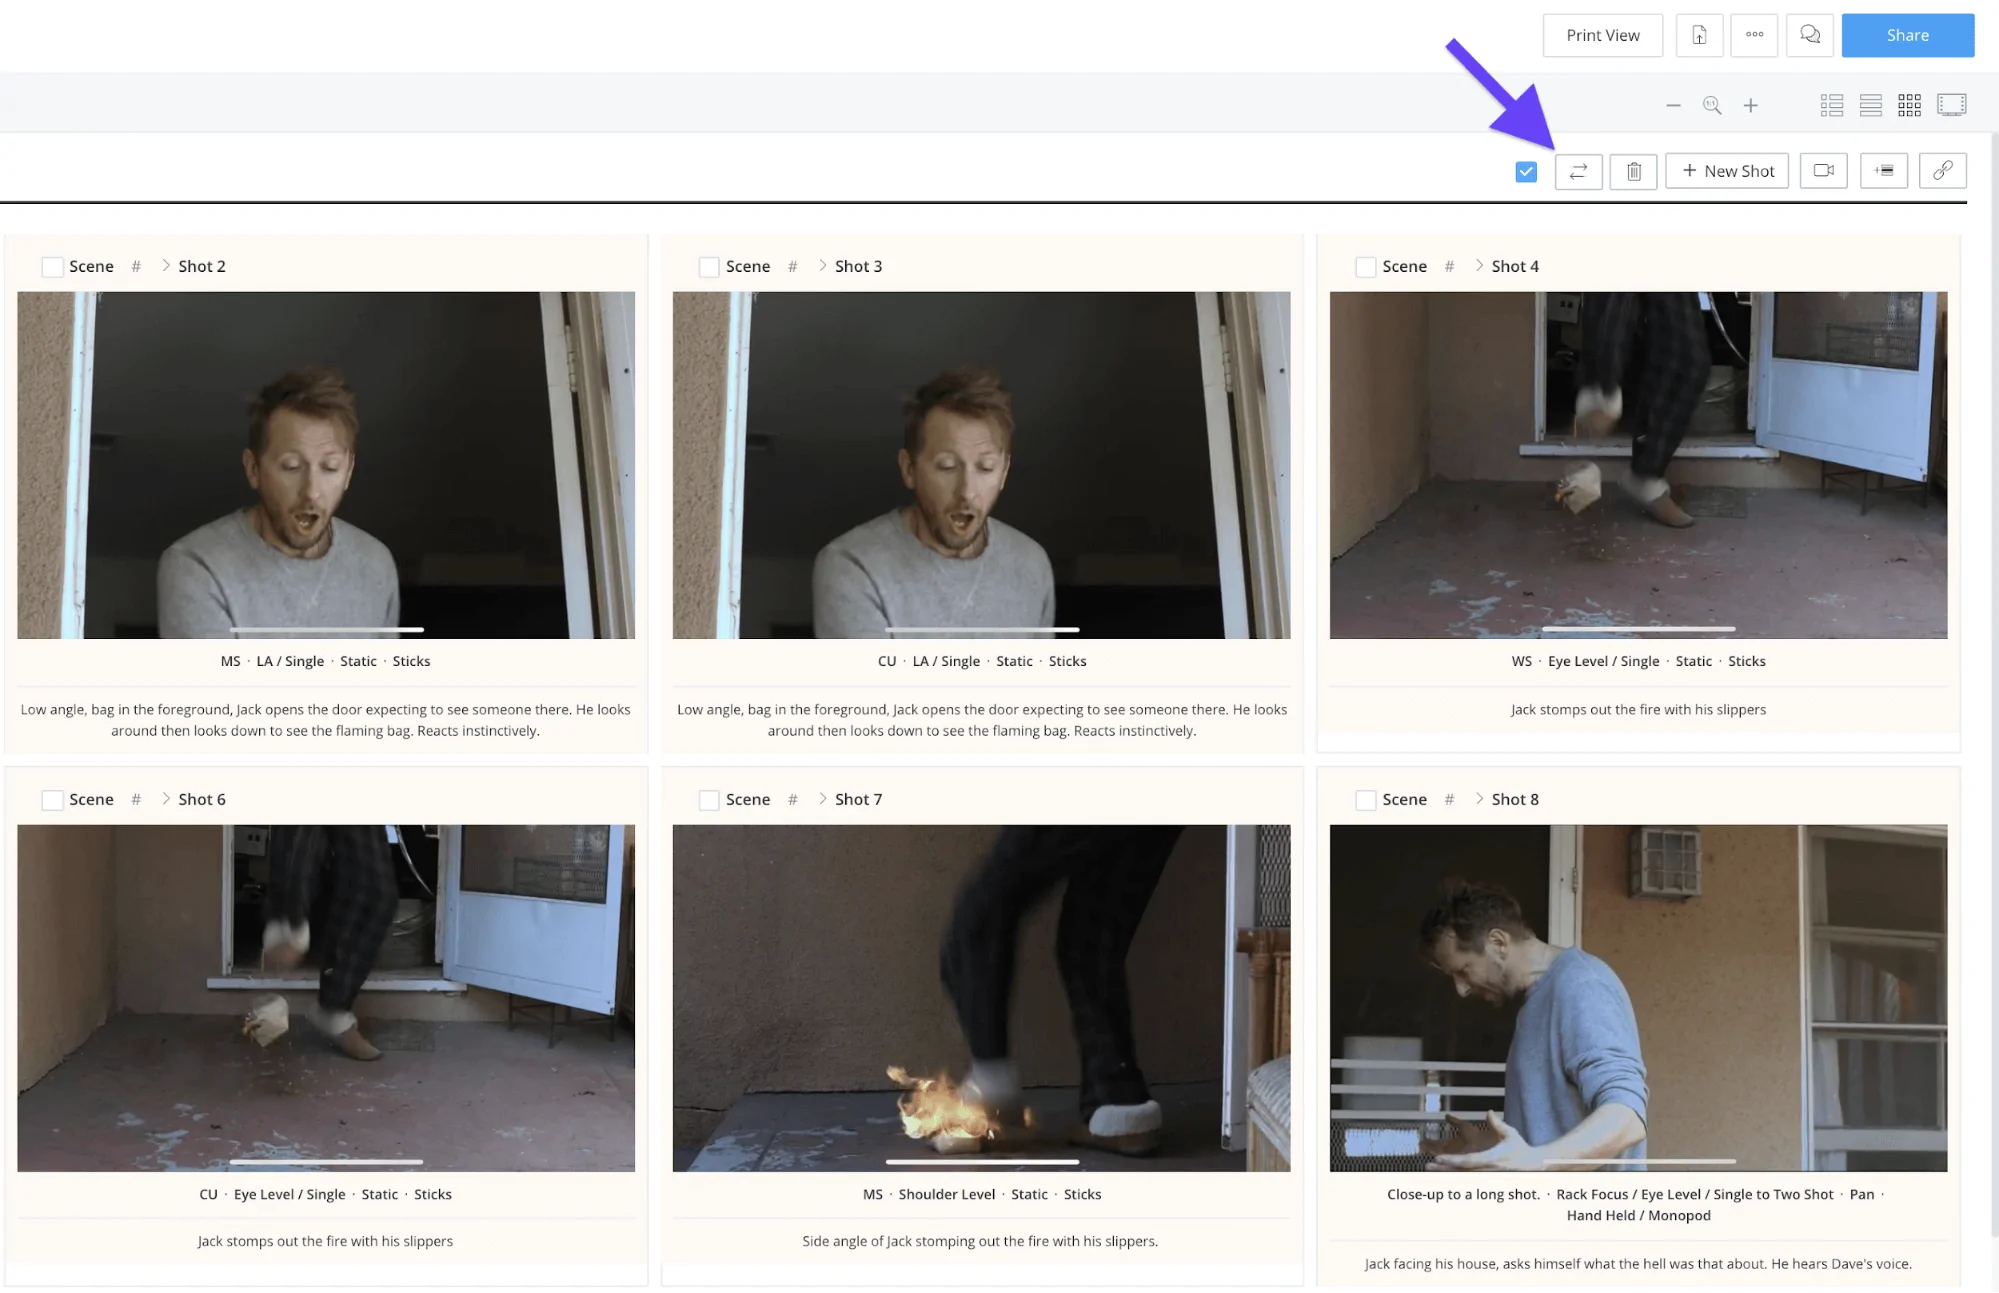
Shot lists toolbar • Click move button
...and select the correct scene to move the shots to and click Move.
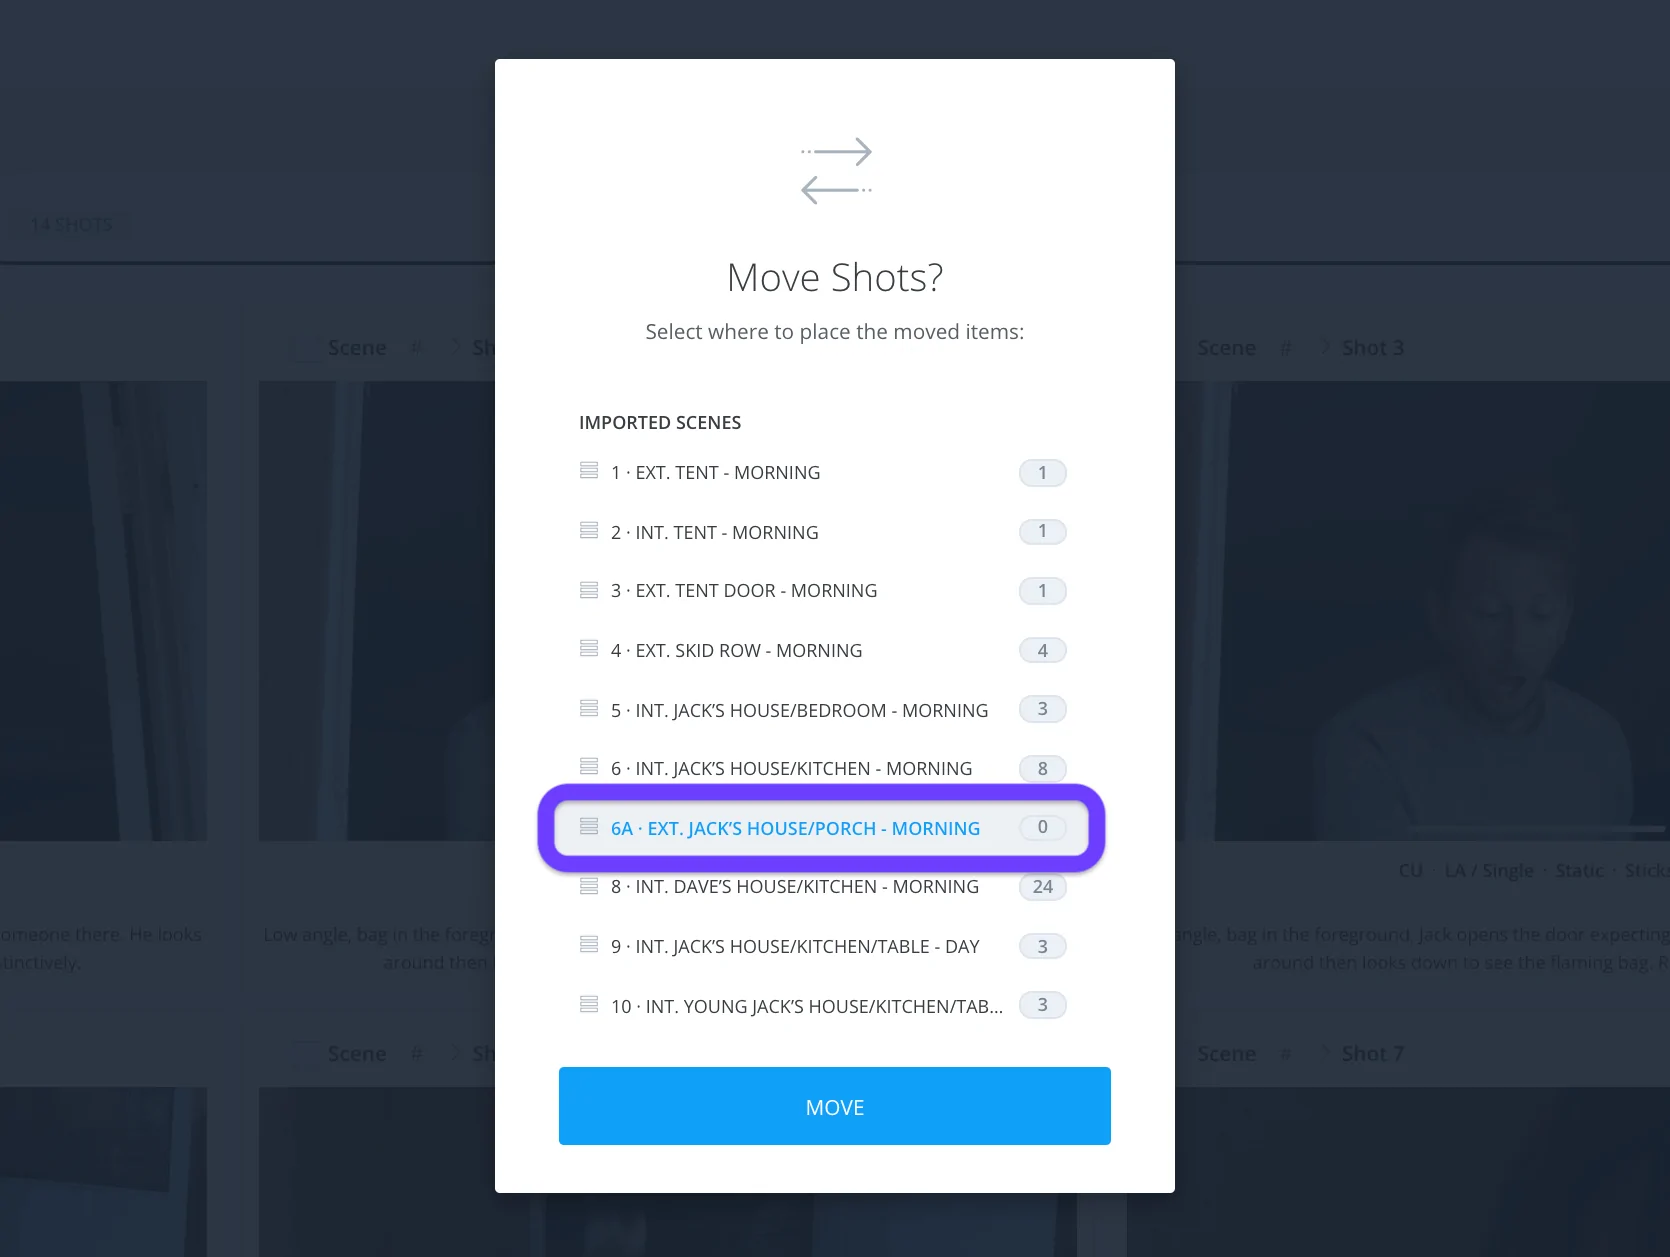
Select scene • Click move
Now, your shots are in the correct scene.
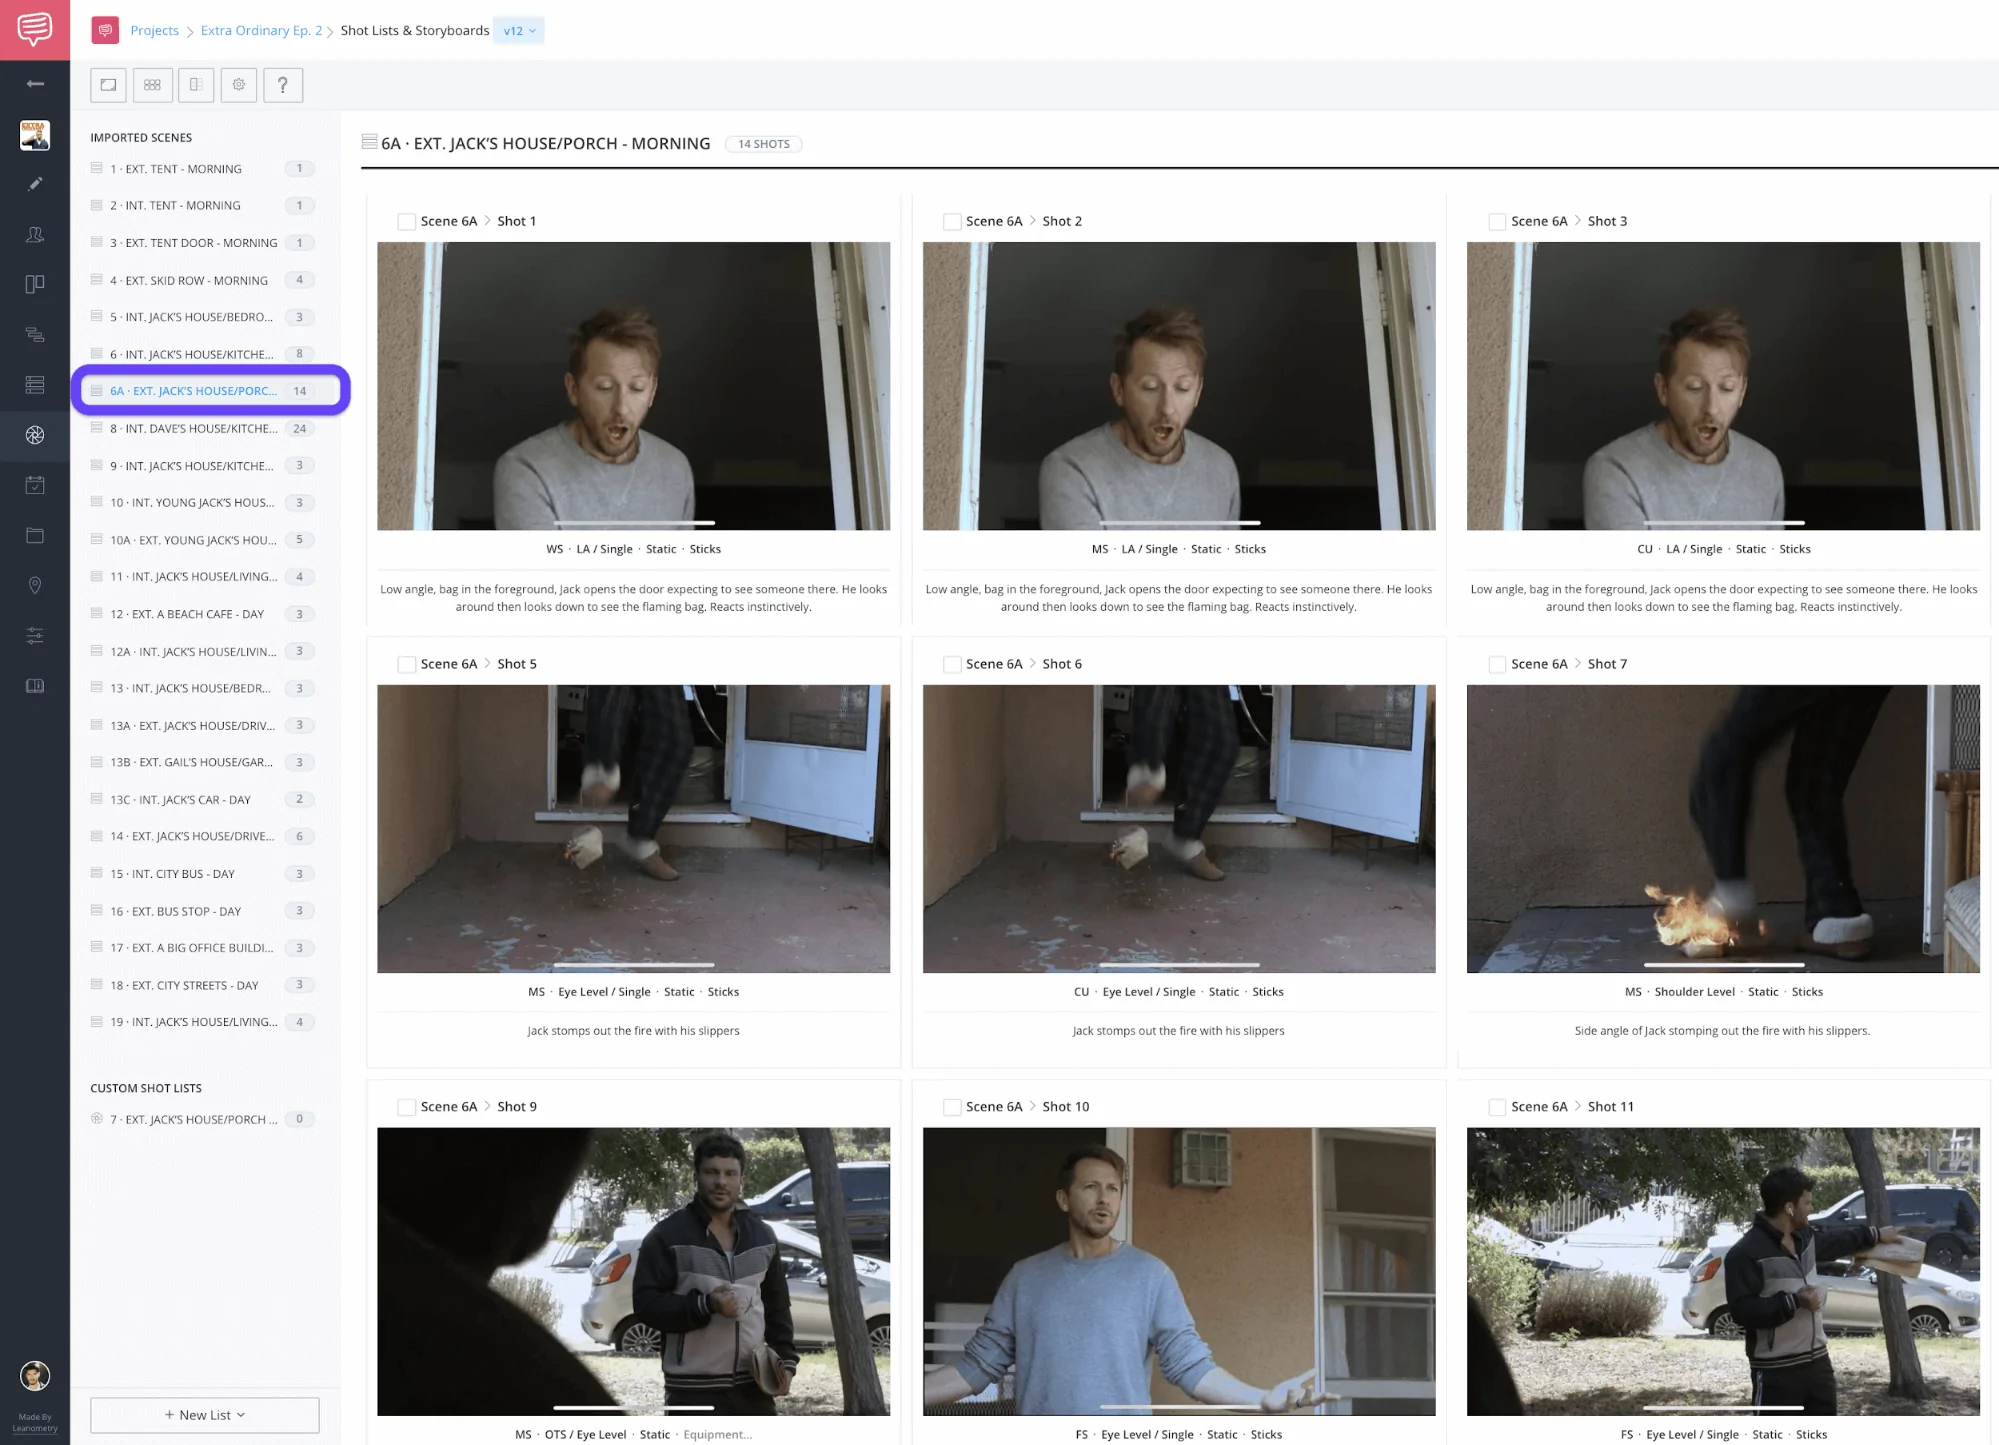
New scene 6A • Fully populated list
That’s it! So, the next time you import a script with new scene numbers don’t panic if the shots are gone, with this easy trick you’ll be right where you left off in no time. Cheers to your next production!
UP NEXT
Create your shot list
Now it’s time to start pre-visualizing your next project! Get in there and start breathing some visual life to your script. Have you ever experienced losing shots because of scene number changes? Let us know in the comments!
Up Next: How to Make a Shot List →
Showcase your vision with elegant shot lists and storyboards.
Create robust and customizable shot lists. Upload images to make storyboards and slideshows.
