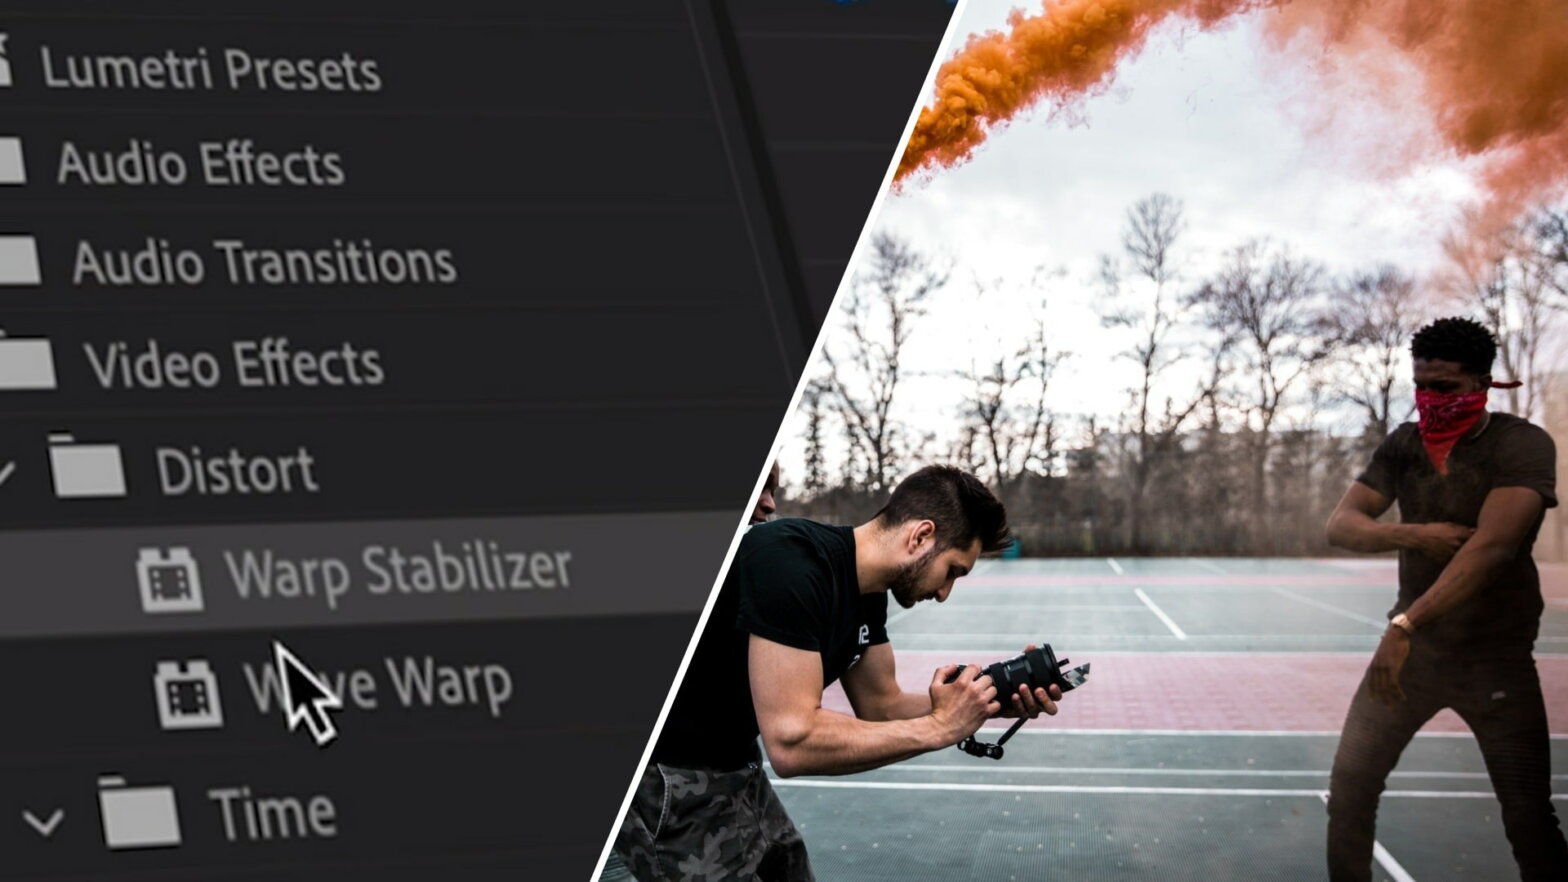
Do you have a shaky video on your hands that you need to make smoother? The solution might be to stabilize your footage in Adobe Premiere Pro. This post will walk you through three simple steps to stabilize your footage in Premiere, plus offer a few tips and tricks to best set yourself up for success. But before we jump into Premiere, let’s start with a primer on best practices for shooting your footage.
How to Stabilize Footage in Premiere Pro
Before getting into post-production
This post will be walking you through the specific process for stabilizing footage in Premiere Pro. But if you have the entire Adobe Creative Cloud at your disposal, you may also be interested in using After Effects to stabilize your footage. This video will walk you through the process.
How to stabilize footage in After Effects
The best way to get smooth footage is to ensure the footage is shot smoothly on set. Use a tripod, gimbal, steadicam, or stabilizer on set to get the best results. If you don’t have any of these tools, you can still set yourself up for success in post by planning ahead and making smart decisions during the shoot that will make stabilizing easier and more effective.
To stabilize footage in post, the editing software needs to analyze each frame and identify certain data points to track their locations throughout the shot. A shot with clearly defined edges will be easier to stabilize in post than a shot of something like a blank wall or a body of water that lacks easily definable spots for the editing software to track.
Properly exposing your footage is also key for any shots that you hope to stabilize in post. Overexposed images and underexposed images will both be difficult for the editing program to analyze and are more likely to result in errors or an undesirable outcome.
With all of this information in mind, we’re ready to jump into Premiere.
HOW TO STABILIZE A VIDEO IN PREMIERE PRO
Step 1: Prepare your footage
The first step is to import your footage and load the shot you want to stabilize into the timeline. Footage can be imported into Premiere in a couple of different ways. The easiest is to drag and drop the files from a separate window. The following video quickly covers multiple methods for importing footage with Adobe Premiere Pro.
How to import footage with Premiere Pro • Adobe premiere stabilize
Once your footage is imported, simply drag it onto the timeline. If you don’t already have a sequence in place, Premiere will automatically create one that fits the specs of your selected footage. You can also place footage on the timeline by pressing the ‘.’ or ‘,’ hotkeys. Check out our ultimate guide to Premiere keyboard shortcuts for more.
How to Fix Camera Shake in Adobe Premiere
Step 2: Apply ‘Warp Stabilizer’
Step Two is where most of the work gets done. Premiere has a built-in effect that does most of the heavy lifting, but the results aren’t always perfect. So we’ll be fine-tuning and correcting the effect in step three.
The effect we want is called ‘Warp Stabilizer,’ and you can find it by switching to the effects tab and typing the effect’s name in the search box. Or by opening the ‘Video Effects’ folder and the ‘Distort’ folder contained therein.
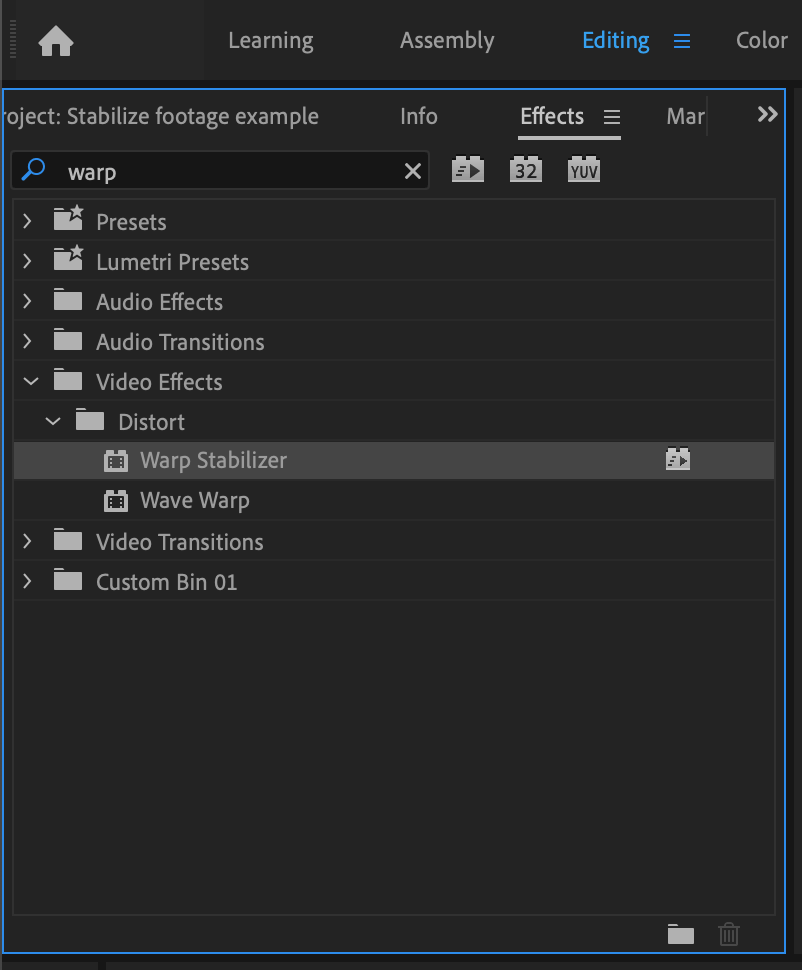
Where to find the warp stabilizer effect • Stabilize footage Premiere Pro
To apply the effect, all you need to do is drag it onto the clip. Next, Premiere will automatically analyze the footage and do its best to stabilize it. This is a two-step process and it's all automatic. Depending on the length of the clip and other factors such as exposure, analyzing the footage and applying the effect may take a while.
If Premiere really struggles with this step, you may be in need of more powerful hardware. Check out our list of the best laptops for video editing if you are in the market for a new computer.
When Premiere has finished, your footage will now be stabilized. If you’re lucky, you’ll see good results right away and be ready to move on. If the results are less than satisfactory, don’t worry, we can fine-tune the process and attempt to correct errors.
How to Reduce Shakiness in Premiere Pro
Step 3: Fine-tune and correct the effect
The Warp Stabilizer effect is not perfect but it does offer a number of fine-tuning options to dial in the best results possible.
Let’s take a look at those options.
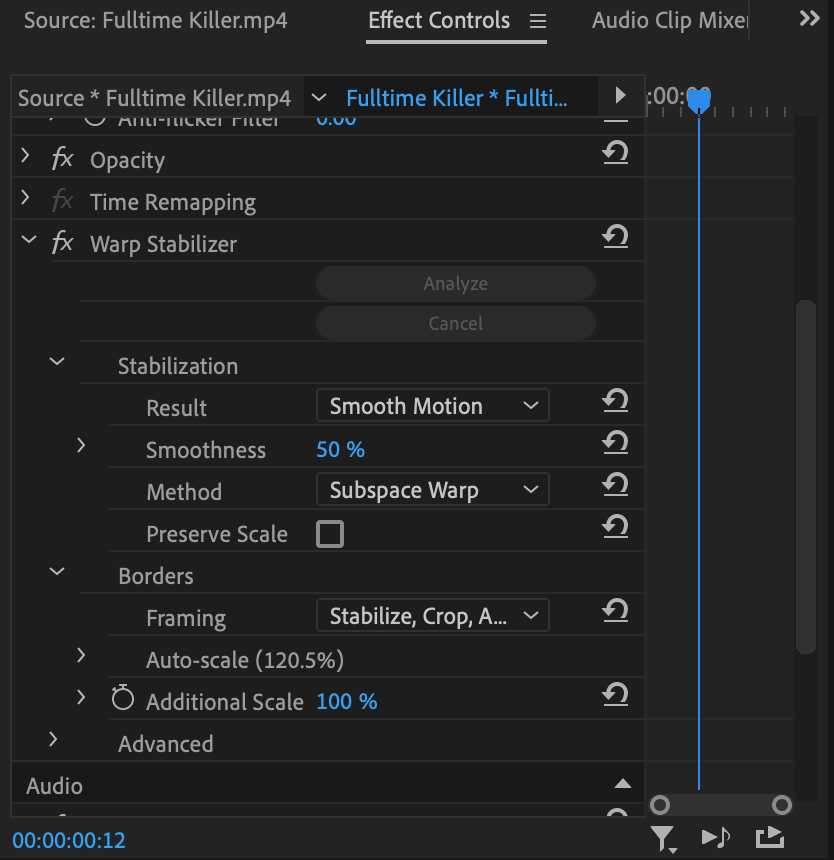
Warp Stabilizer fine-tuning options • Premiere Pro stabilize clip
To fine-tune our stabilization, we’ll want to pay close attention to the ‘Smoothness’ percentage. The higher the percentage, the smoother the video will look. Setting the number to zero will essentially revert the footage back to its unstabilized state as far as motion is concerned.
Be aware that this percentage can go above 100%; it can go all the way up to 1,000%, so you have a ton of room to experiment and dial in the smoothness to your exact preference.
By default, the Warp Stabilizer effect sets its ‘Stabilization Result’ to ‘Smooth Motion.’ However, if you want your footage to have no motion at all, the effect can attempt that as well.
All you have to do is set the ‘Result’ option to ‘No Motion.’ If you don’t see any change right away, be sure to click the ‘Analyze’ button again.
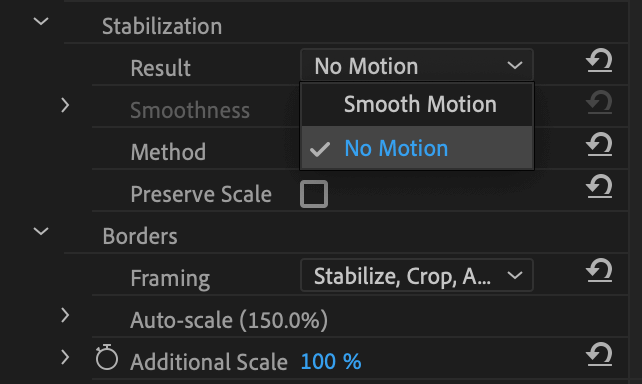
How to remove motion altogether • stabilizer adobe premiere
Under the advanced options list, we have a few more parameters that we can use to fine-tune or correct the results. Checking the ‘Detailed Analysis’ box will tell Premiere to dig a little deeper into your footage while analyzing and tracking the motion.
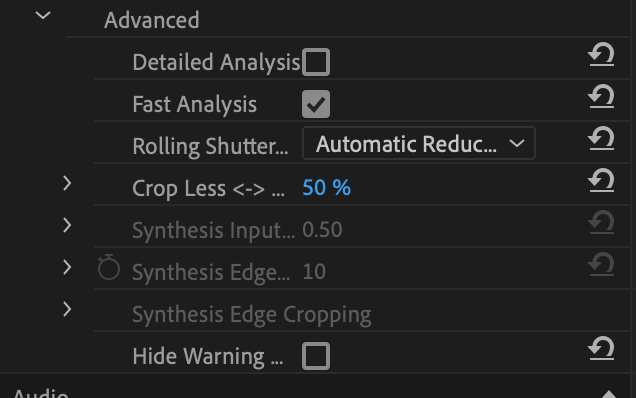
Advanced fine-tuning options • Stabilizer Premiere Pro
Another important parameter in this menu is the ‘Crop Less’ percentage. Cropping and zooming are important parts of stabilizing footage. Otherwise the blank spaces beyond the edges of the frame could become visible once your footage is stabilized. The Warp Stabilizer effect automatically crops/zooms by default, but you can heighten or lessen the effect by altering this percentage.
The last major parameter we can use to correct unsatisfactory results is the stabilization method. There are four methods to choose from that will produce slightly different results using the same footage.
One is not necessarily better than the others but may produce better results in certain circumstances. If fine-tuning the other parameters is still not resulting in a quality outcome, try altering the stabilization method and experiment with the different types to see which works best in your particular scenario.
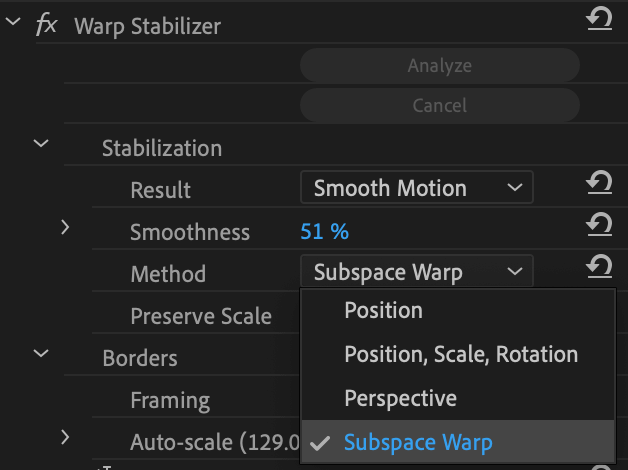
Advanced fine-tuning options • Stabilizer premiere pro
Once you have found the perfect settings to get the best possible stabilization, you can save these settings as a preset. This will speed up the process the next time you need to stabilize similar footage.
How to save an effects preset in Premiere Pro • Premiere Pro stabilizer effect
And that is everything you need to know about stabilizing footage in Adobe Premiere Pro.
Up Next
How to Speed Up Video
Congratulations, you now know how to stabilize footage like a pro in Adobe Premiere Pro. Stabilizing your footage is an important step in speeding up a video without it becoming jittery. To learn the rest of the steps, check out our guide to speeding up video in Premiere and on various social media platforms.
Up Next: Speeding Up Video →
Showcase your vision with elegant shot lists and storyboards.
Create robust and customizable shot lists. Upload images to make storyboards and slideshows.
