Whether you are editing YouTube videos, a science fiction film, or a commercial, a glitch effect can add a whole lot of production value to your project. Learning how to create a glitch effect from scratch in Premiere Pro will also help you learn how to get creative with duplicating frames and adjusting their qualities to create various effects. In this article, you’ll learn how to create glitch effect in Premiere Pro step by step.
How to Make Glitch Effect Premiere Pro
Cut up your timeline
Throughout this article we’ll go through the step-by-step process on how to create a glitch effect from scratch in Premiere Pro.
The process we will be following is the same process outlined here in this video tutorial by Peter McKinnon.
Glitch transition Premiere Pro Tutorial
Start off by selecting the Blade tool and creating a sequence of cuts on your timeline. These cuts can be every frame or every few frames. The idea here is to space them out so that they are noticeable when every other block of footage is deleted.
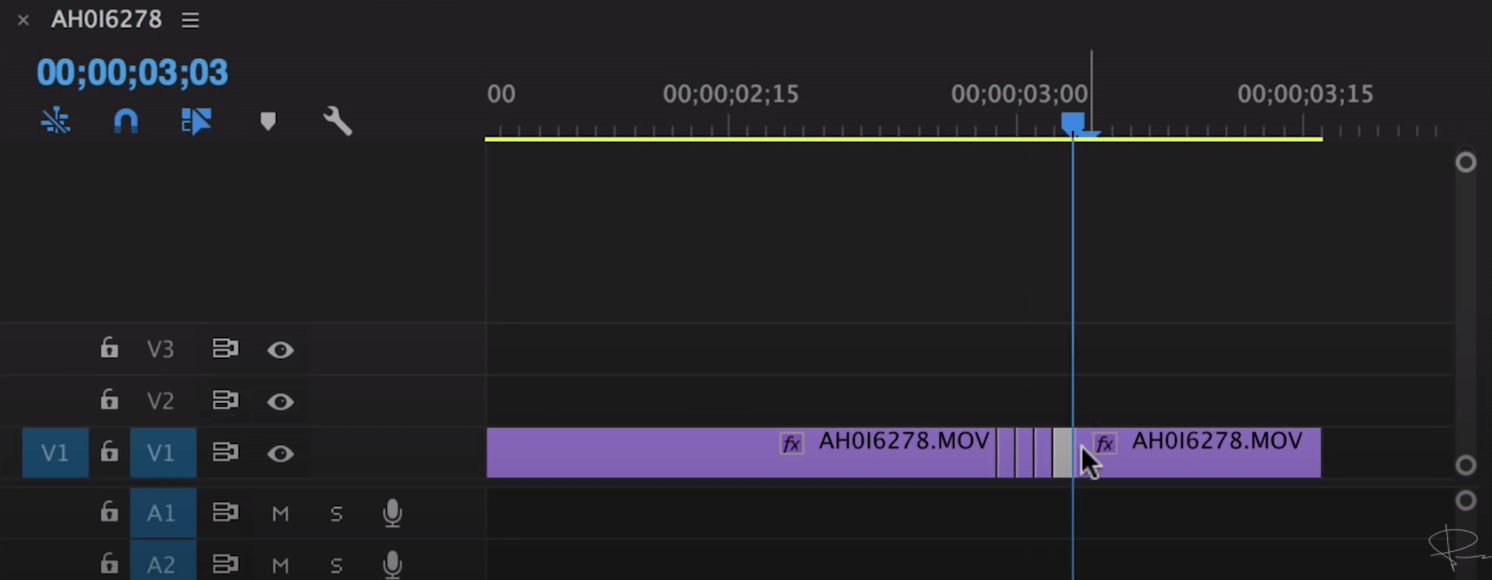
Glitch effect premiere pro Tutorial
It’s important to keep in mind that the segment of your timeline that has these cuts will be where your glitch effect plays. So make sure you make the cuts at the appropriate and desired point in the footage. The number of cuts will also determine the length of the glitch effect.
Glitch transition Premiere Pro tutorial
Delete blocks of footage
Next, delete varying blocks of footage. This can be every other frame, or completely at random. Experiment with the frames you do delete and let the video play to see if you like the strobing effect it creates.
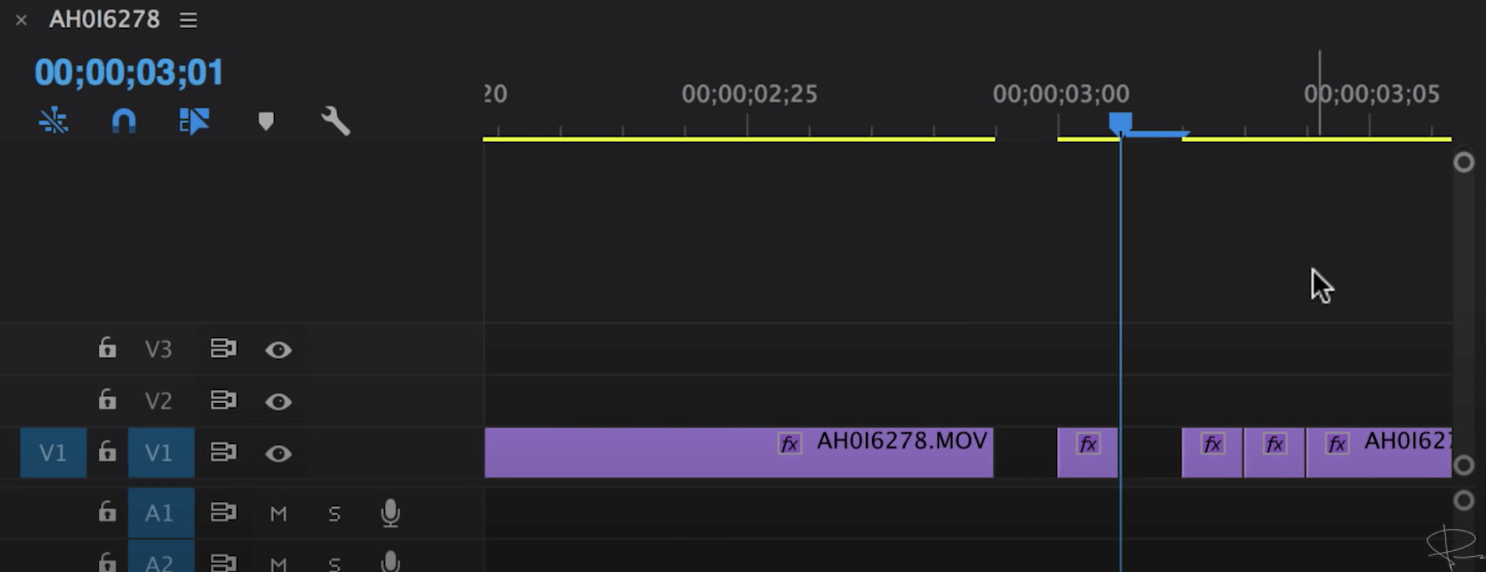
How to make Glitch Effect Premiere Pro
If the duration of your glitch effect is not long enough, simply create more cuts and delete more blocks of footage. Deleting random blocks of footage in no distinct pattern will help make the effect more glitchy.
How to make Glitch Effect Premiere Pro
Create copies of your frames
Once you’re finished deleting your blocks of footage, the remaining frames on your timeline will be staggered. To create the glitch effect, you will need to duplicate these staggered blocks. Simply hold down ‘ALT’ on your keyboard and drag the frame upward to duplicate it.
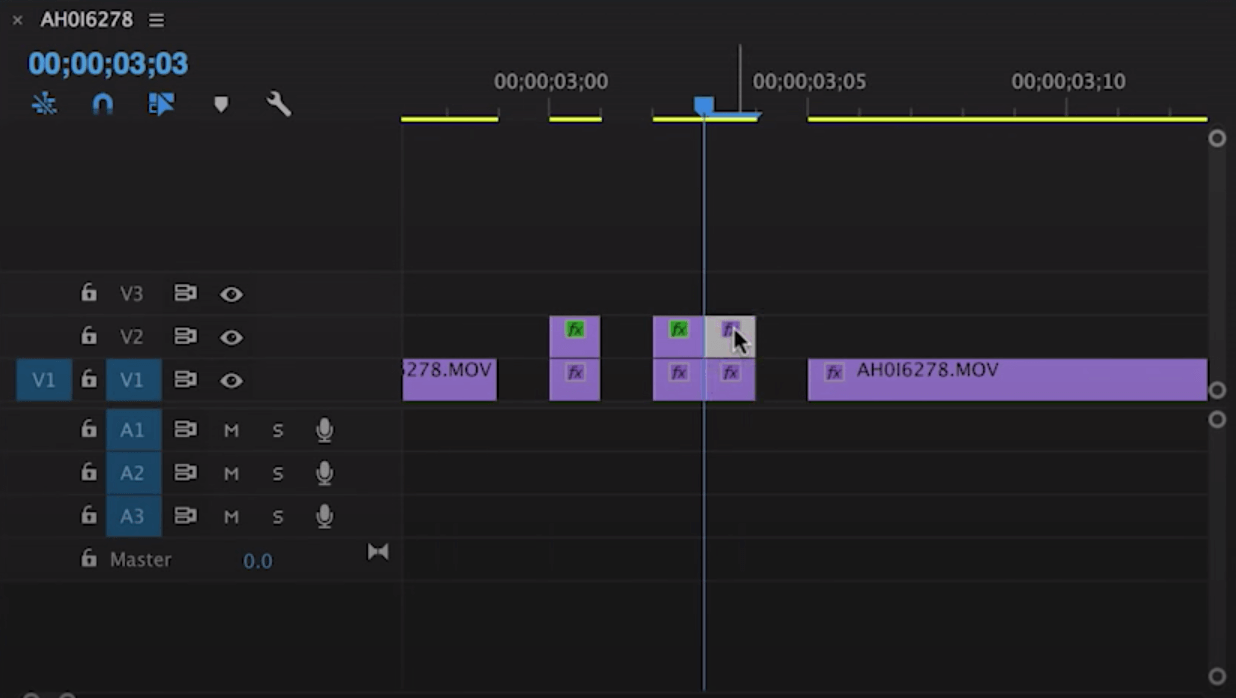
Duplicate blocks on timeline • Glitch effect Premiere Pro
Repeat this for the remaining staggered blocks on your timeline so that every block has a duplicated clip on the track above it.
Video Glitch Effect Premiere Pro Tutorial
Reduce the opacity
For each duplicated clip, reduce the opacity. Do this by selecting the duplicated clip, navigate to “Effect Controls” and drop the opacity to around 50%.
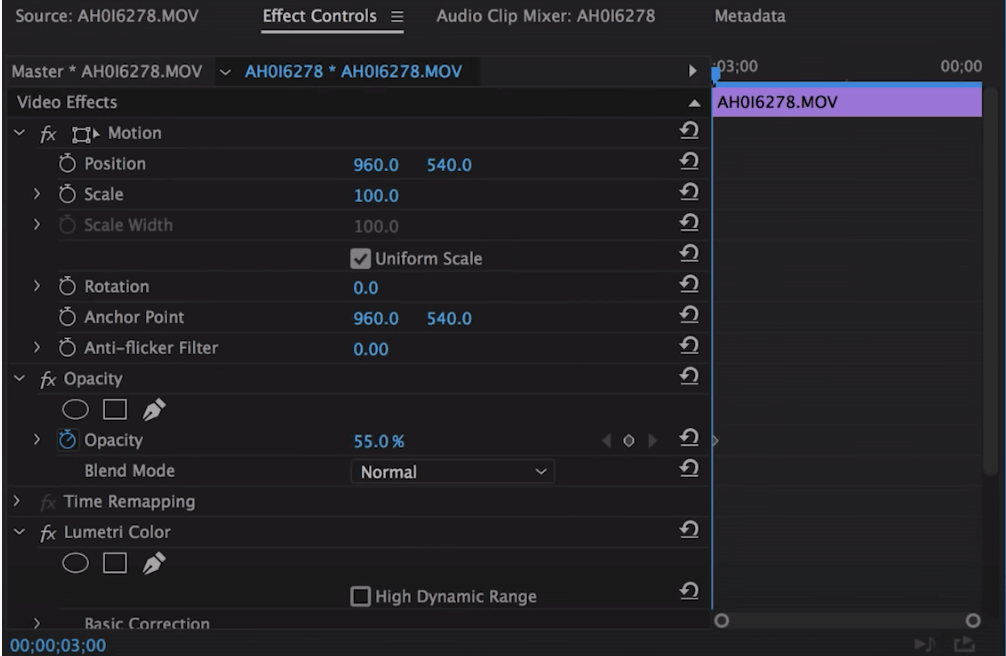
Reduce Opacity • Adobe Premiere Pro glitch effect
Repeat this for every duplicated frame on your timeline. Now, it’s time to bring the glitch effect to life.
Related Posts
How to Make Glitch Effect Premiere Pro
Shift the frame
For each duplicated clip, slightly shift the position of the frame. Do this by navigating to the same “Effects Control” panel as above.
Adjust the “Position” of the duplicated frame slightly so that it creates a faded duplicate frame in the video.
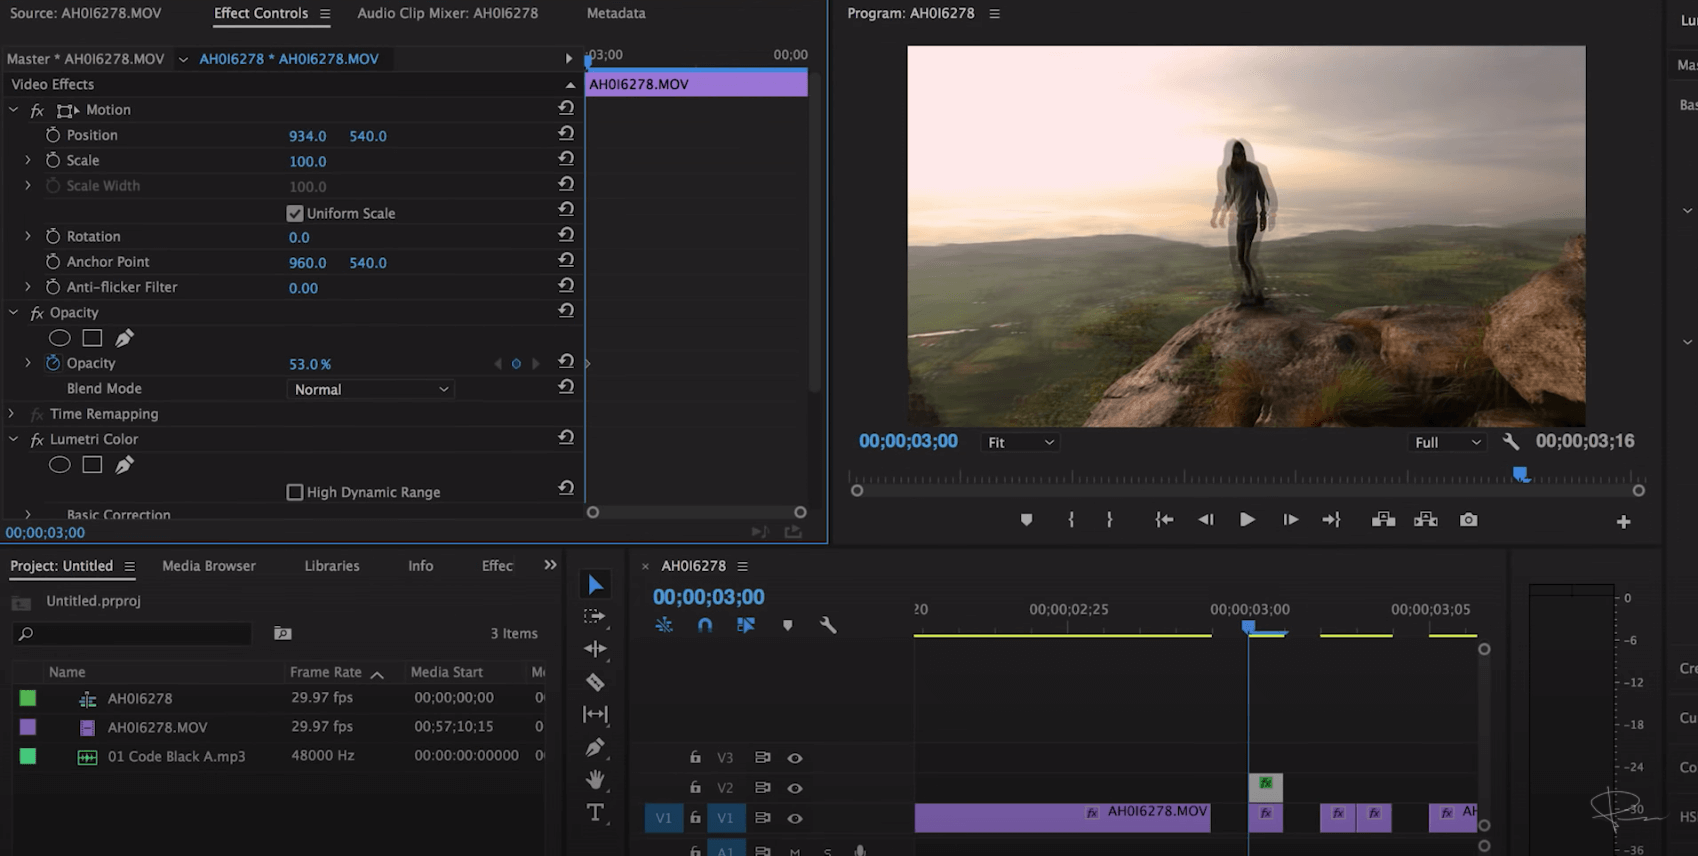
Video glitch effect Premiere Pro
Repeat this process for every duplicated frame. To make your glitch effect more interesting, try to change the positions and alterations to the positions for each frame. For example, the first duplicated frame can move slightly to the right while the second frame can be moved upward and increased in scale. This will make for a visually more interesting glitch effect.
Adobe Premiere Pro Glitch Effect Tutorial
RGB Splitting
Finally, to get the cool color glitch effect, you’ll want to split the RGB color channels of each clip. You can do this by going into the “Effects” tab in Premiere and find the “Arithmetic” effect.
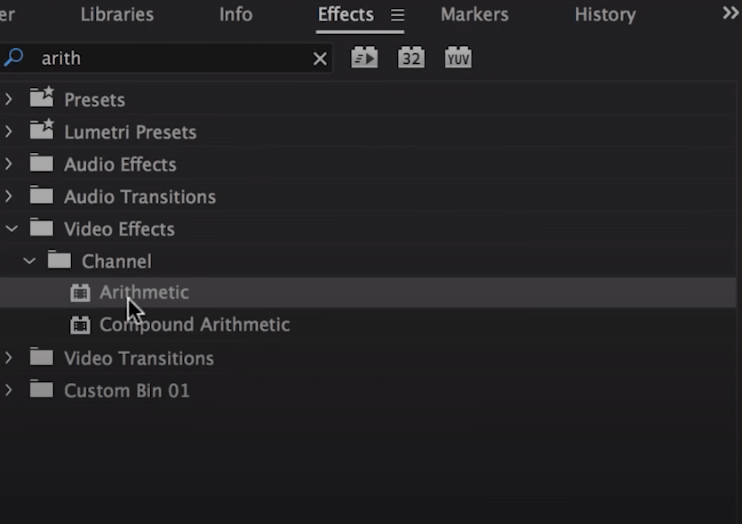
How to make Glitch Effect Premiere Pro
Drag and drop this effect to the desired frame. In the “Effects Control” panel for this clip, you’ll notice the red, green, and blue channels are now separated. To start adjusting the colors of the frame, click “Operator” and from the drop down menu select “Max.”
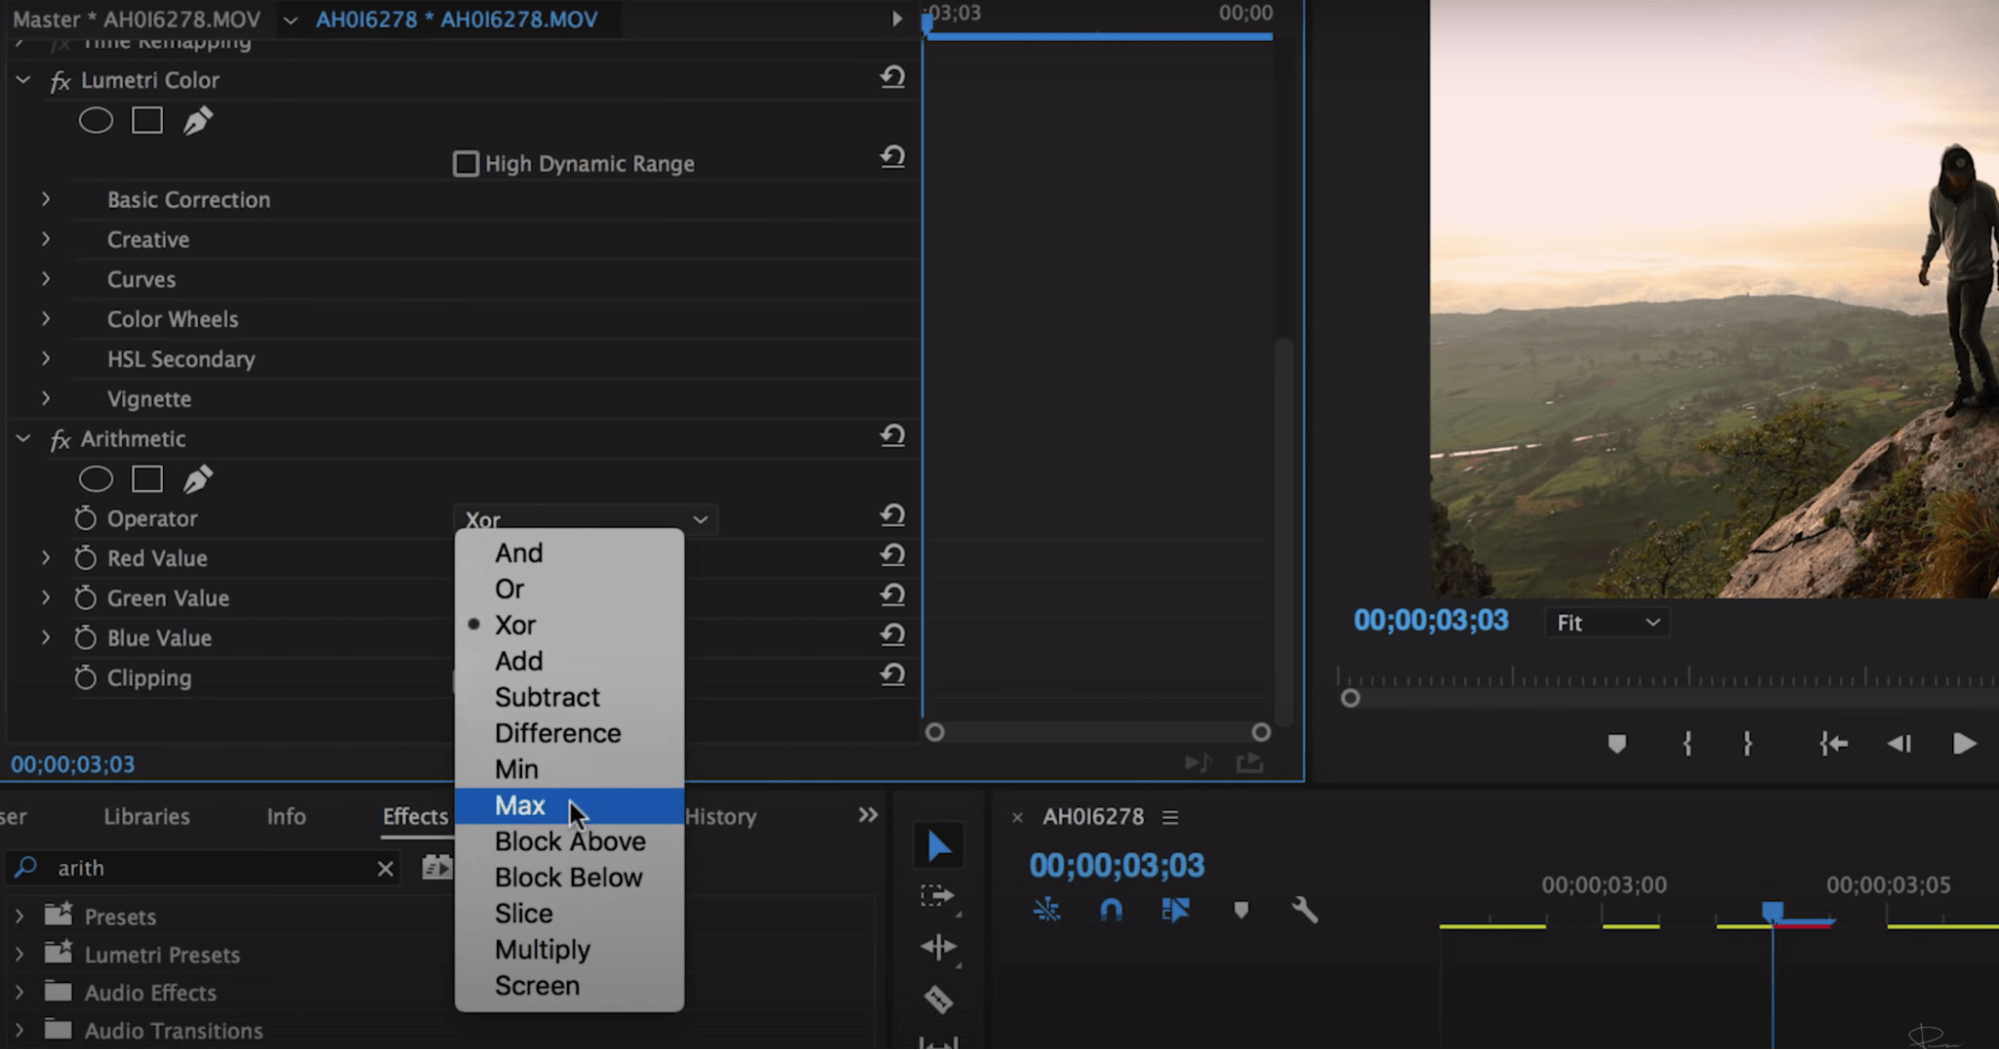
RGB Splitting • Glitch effect Premiere Pro
Then increase the value of the color you want your frame to predominantly be. This will cause the frame to be washed in that color. To reduce the saturation and blending of the image, click “Blend Mode” under “Opacity.” From the drop down menu, select “Linear Dodge (Add).”
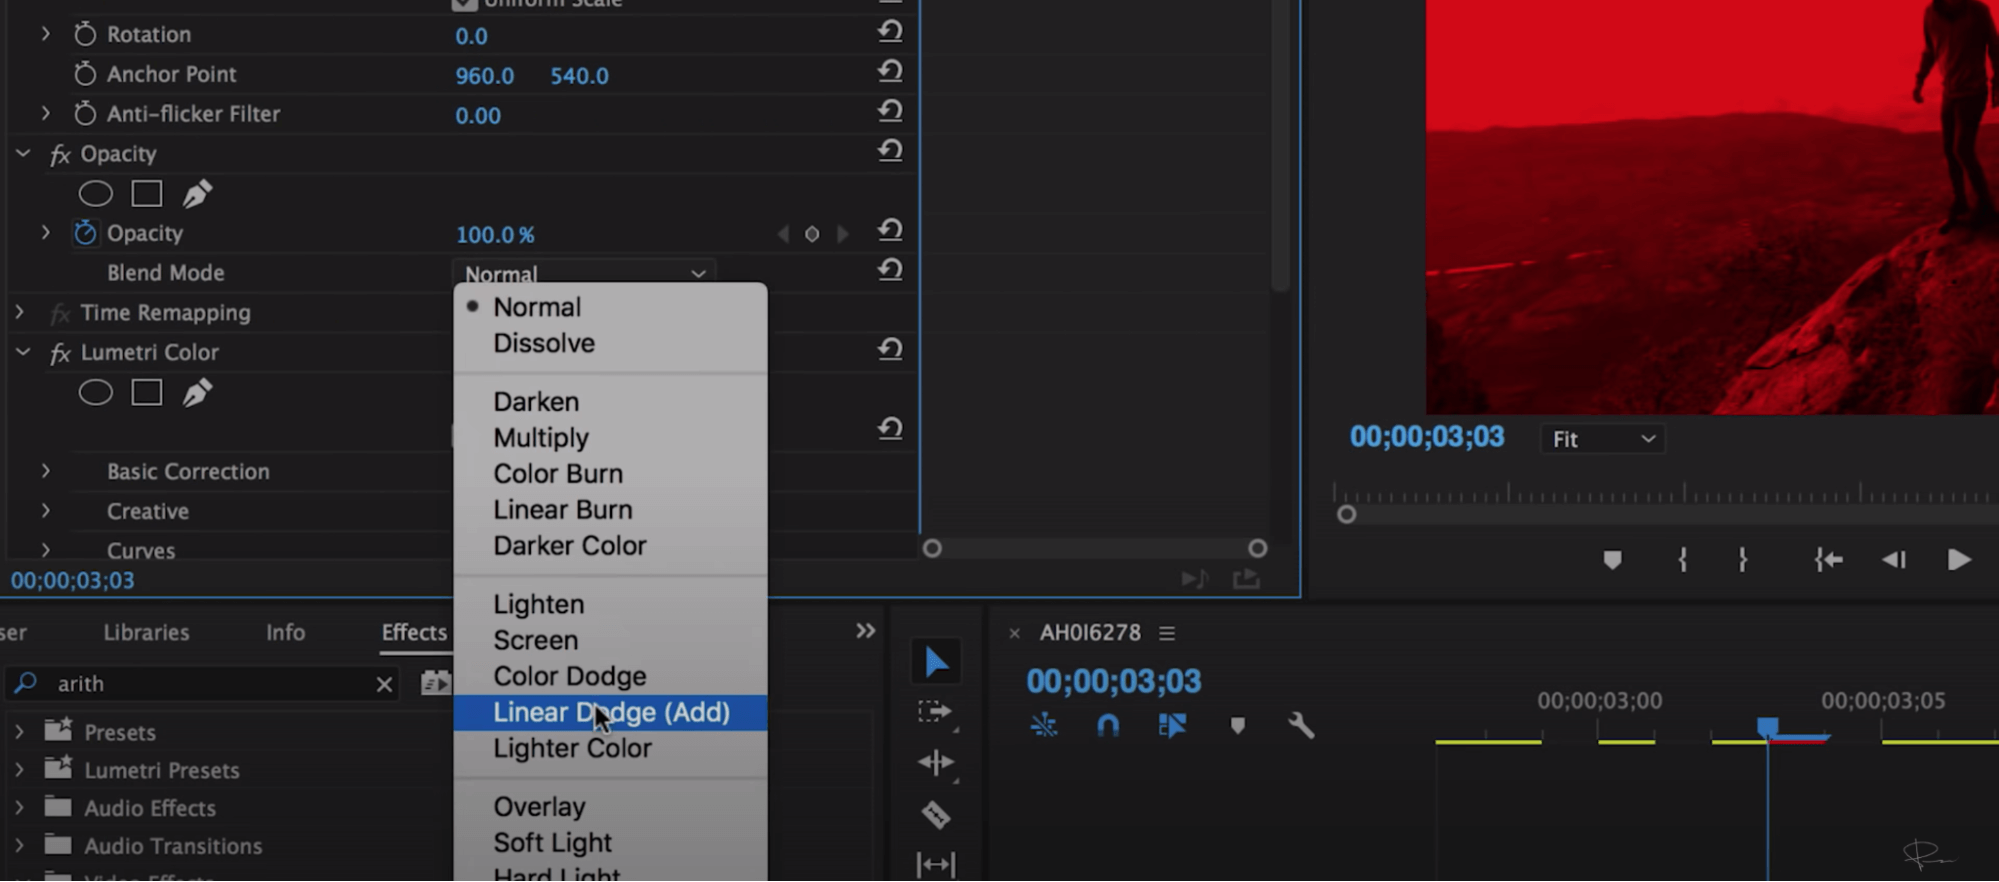
Linear Dodge Add • Premiere Pro glitch effect
The final result of following these steps is a simple glitch effect that alters the colors, sharpness, and position of specific frames. Feel free to experiment with things like positioning and RGB splitting to get different and unique glitch effects that you like.
Up Next
Best Free Video Transitions
Learning how to create your own effects and transitions will undoubtedly make you a better editor. But sometimes, you’re fighting against a clock and need some tools to help save time. Check out our next article to find links to the best video transition templates for all editing softwares.
Up Next: Video Transitions →
Showcase your vision with elegant shot lists and storyboards.
Create robust and customizable shot lists. Upload images to make storyboards and slideshows.
